Manure tea – doesn’t that just sound like something you’d like to have some crumpets with? Well, no.
But your garden will most definitely enjoy a cup, so today we’re going to talk about how to make and use your very own manure tea to get the best out of your crops.
Don’t mistake manure tea with compost tea; they’re two completely different beasts. Compost tea is all about microorganisms that are beneficial to both soil and plants. Manure tea is all about the nutrients in manure.
What is Manure Tea?
Manure tea is pretty much what it sounds like: liquid compost made from manure steeped in water. It’s not just manure that you add water to – well it is, but it’s a bit more involved than that, but not by much. Just like everything else in prepping or homesteading, it just requires a bit of effort and a small bit of time for a big payoff.
It’s high in nutrients needed by plants, especially nitrogen. It’s particularly good for deep-rooted plants such as vine plants and cereal grains that are deep feeders that take a toll even on fertile soil. Since it’s liquid, it seeps down deep into the soil to nourish the plants where they need it. It’s a wonderful compliment to the benefits that your compost adds to the soil.
Benefits of Manure Tea
There are several benefits to making and using manure tea, including:
- Even if you have to buy a bag of manure, which will make several 10-gallon batches of tea, you’ll still only spend a few dollars – less than you’d pay for a fancy cup of coffee.
- Unlike commercial chemical fertilizers, manure tea won’t damage your soil or add chemicals to your plants.
- It’s nitrogen-rich, which is the primary nutrient that many plants lack. Lack of nitrogen is what contributes to bottom rot in tomatoes and soil often gets “tired” and needs this boost.
- In addition to nitrogen, manure tea contains many other natural enzymes and micro-nutrients that your plants need that aren’t in commercial fertilizers.
- It’s quick, or sort of. Unlike your compost pile, which can takes months to break down, tea can be made in a matter of a few days, or a couple of weeks, tops.
- Since it’s in liquid form, it’s easy for soil to absorb, and your plants can use it right away.
- You can use it, diluted of course, right in the soil around your plants.
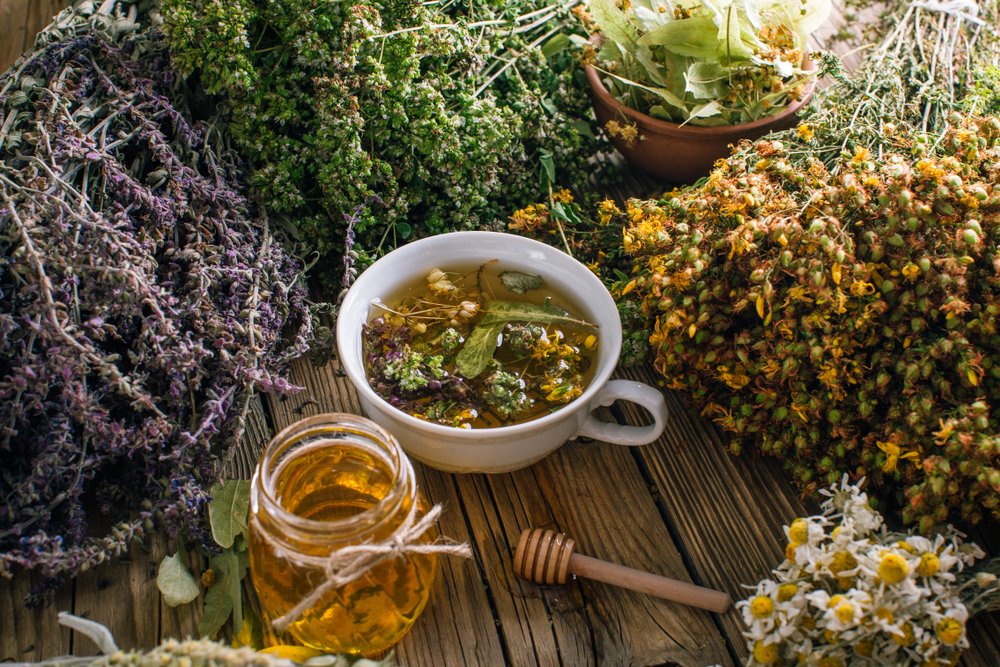
Manure tea sounds even better for plants than herbal tea is to us!
Rules to Making Manure Tea
Like I said, making manure tea takes a bit of time and effort but, unlike many of our gardening tasks, it’s not particularly labor-intensive. If you have some manure on hand, you can easily do it.
There are only two main rules for making manure tea: don’t use manure from carnivorous animals and don’t use the original tea without diluting it. Think of it as any other concentrated fertilizer, except it’s organic, arguably of better quality, and practically (or completely) free.
What Type of Manure is Best?
Just like there are things that you can’t put on your compost pile, there are also certain types of manure that you shouldn’t use.
You can use horse manure, cow manure, goat manure, or even rabbit droppings to make the best manure tea. If you’re in an area where you have elk, moose, or other large, herbivorous animals such as elk or moose, you can use that too. If you’re in a survival situation after a SHTF event, you can use just about anything as long as it isn’t a meat eating animal.
The reason that you don’t want to use manure from a carnivorous animal is that it contains toxins and pathogens that can make you extremely sick.
Fresh manure is best, but dried will work just fine. You may need a bit more dried manure in order to get the tea strong enough.
Either use your own manure or make friends with a local farmer or horse stabling facility. You can also buy bagged manure from a garden center or a nursery. Believe it or not, there are actually places online that sell manure tea bags so that you can make your own without having to source the manure.
It kind of makes you wonder if they come in single serve or family size, right?
How Do You Make Manure Tea?
There are three basic ways to make manure tea. They’re all easy, but one requires some easily-obtainable materials. However, it has some additional benefits too, so you may consider it worth the extra effort. Regardless of which method you choose, consider using pond or lake water for the additional nutrients.
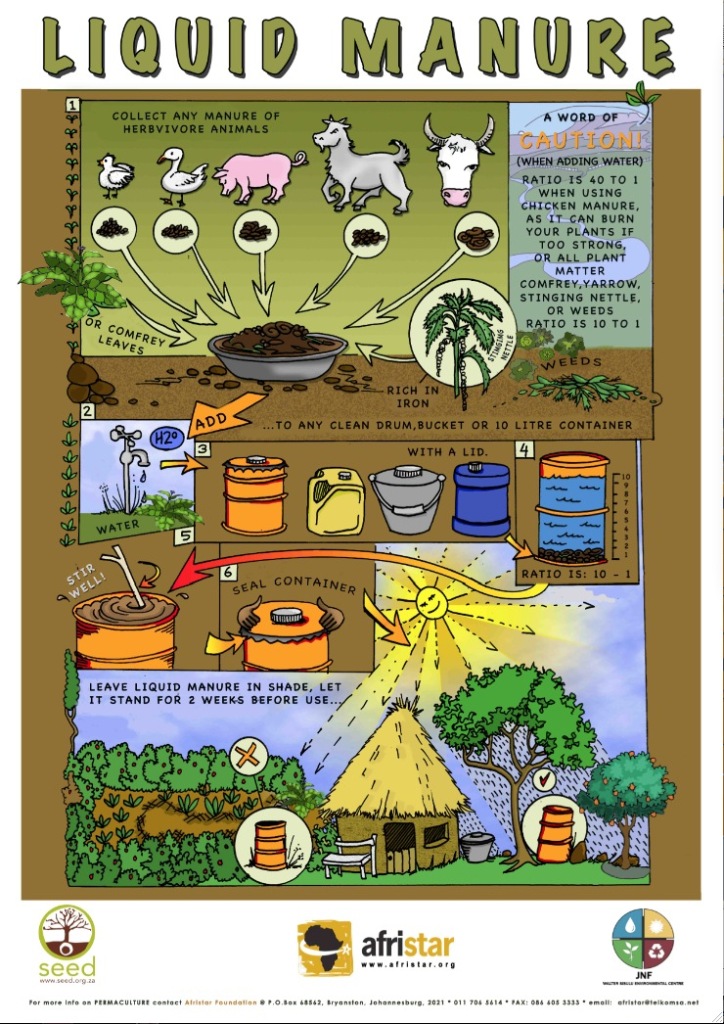
The toss it and stir it method
This is probably the easiest way to make manure tea, but there are a couple of downsides that we’ll get to in a minute. To make the tea this way, you simply toss your manure in a bucket or barrel, cover it with water (about twice as much water as manure), and let it steep preferably in the sun so that the water stays warm, which helps break down the organic material. You’re making sun manure tea!
Stir it once a day or so to help the chunks break down, and add more water if it isn’t extra soupy. Let the tea steep for a week or two. The longer it steeps, the stronger it gets but you can start to use it after a few days – it just won’t be as strong.
Though this is crazy simple, you’re going to have to strain the leftover organic matter from the liquid using either a fine screen or some kind of cloth such as an old pillowcase or burlap. That can get sort of messy, but you don’t want any of the larger chunks to make its way into your tea. This is where using a “tea bag” comes in handy.
Another downside to this is that it doesn’t smell so great. You could, of course, put a loose lid on it to keep it from smelling too much.
The tea bag method
This one is exactly what it sounds like – you put the manure in a “tea bag” of burlap or an old pillowcase (use whatever fine cloth you have on hand), then steep it in a bucket or barrel of water, depending upon how much you’re making.
“Dunk” it good once a day or so to help break up the matter and speed up the steeping process. As with the first method, let it the manure tea steep for a week or two in order to get maximum effect. After it’s steeped long enough to be the color of strong coffee, pull the bag out and tie it above the bucket or barrel for a day or two so that it drains, then.
The Manure Teapot Method
I like to refer to this method as the teapot because it’s quite literally sitting in a barrel while it steeps, then is filtered as you drain it out. Cut the top off of a 50-gallon drum and clean it well. You’ll also need:
- A spigot with an open/close valve
- Enough sturdy, medium-mesh screen to cover the back of the spigot (about 6 inches in diameter, so that you can bow it toward the inside of the barrel a bit instead of having it flat against the hole)
- 2 pieces of fine-mesh chicken wire, cut just a bit bigger than the diameter of the barrel
- A couple of bricks
- Enough hay or straw to fill the barrel about 1/3 of the way full (straw works best because it breaks down a bit slower)
- Enough manure to fill the barrel 1/2 – 2/3 full
- Water to fill the barrel almost full
- A lid (plywood works) for the barrel
- 3 concrete blocks
This is super simple to make. The hardest part is securing and sealing the spigot to the barrel. Speaking of which, that’s the first step.
- Cut a hole in the barrel about 4 inches from the bottom and secure the spigot permanently; if you use a metal barrel, braze it, if you use a plastic one, you can either do it yourself or buy a spigot kit from your local home improvement store.
- Shape the screen into a bowl shape and secure it over the hole inside the barrel. I prefer to secure it temporarily by simply duct-taping it so that I can clean it when the barrel is empty.
- Push the first piece of chicken wire down into the barrel, being careful not to squish the screen. The wire should be above the screen.
- Place the barrel in a sunny spot on top of the cinder blocks
- Put the straw in the barrel.
- Put the second piece of chicken wire on top of the straw and weight it down with the bricks.
- Add the manure.
- Add the water.
- Add the lid.
- Once a day or so, circulate the water so that the tea steeps better. Do this by filling a bucket from the spigot and then pouring it back into the top of the bucket. Drain and circulate a few buckets full each time.
- Steep for a week or two. You can actually keep adding to the mix as necessary, though I prefer to drain the barrel so that I can clean the screens and add more straw.
The straw or hay serves two purposes: it acts as a filter and it adds its own bit of nutrients to the mix. I’ve wondered if leaves would work as a filter because they’re so nutrient rich, but haven’t tried it yet because I’m afraid they’d clog the screen. I may try just adding a few in with the straw.
Tip: This can be scaled down if you don’t need this much manure tea. Use a 5-gallon bucket instead of a drum. You could also use a plastic garbage can of any size.
How to Use Manure Tea
Regardless of which steeping method you use, the tea will be strong enough within just a few days to burn your plants if you don’t dilute it. It should be the light-brown color of fairly weak tea when you use it. This tea is great for your patio plants and vines as well as your edibles. Just about every plant loves manure tea!
The only vegetables that you probably shouldn’t use manure tea on are root vegetables such as turnips, carrots, beets, radishes, and potatoes. They prefer a more potassium-rich soil than nitrogen-rich, and if you use tea on them, you’ll likely end up with big, beautiful top greens but not-so-beautiful veggies.
Now that you know how to make your own manure tea, your plants are going to love you. If you’ve made or used manure tea, please tell us about your experience in the comments section below.
This article has been written by Theresa Crouse for Survivopedia.



















please what’s the ratio water mixing per liter of the manure and ratio application per Acre of land.
Depends upon type and age of crop.
The information is very excellent. Thank you. One small query, why should the lid sealed bin be kept under shade? will not it be better if kept under sunlight as it would rise the temperature vis-a-vis increase microbial activities ?