Without a doubt, water collection, storage and sanitation should be at the very top of your prepping list.
Though you can go up to 3 weeks without food, you won’t last much longer than 3 days without water and you’ll be in bad shape way before that.
We’ve spent hours combing the web for some of the best DIY projects water projects and put together a top 10 list for you.
Enjoy!
1. Water Barrel Storage Rack
Storing more than a couple 55 gallon drums of water is a space issue for most people but this simple guide walks you through the process of building a wall unit that will hold seven drums efficiently.
This handy tutorial comes with detailed plans and pictures so that even the newest of DIYers can get this project done. The toughest part is cutting the wood to the right lengths and the biggest expense is the wood, assuming you already have the drums.
If you’re a bit handy or want to take the time to figure out the numbers to scale this project up or down, you can modify this to suit your need for more or less storage space or smaller barrels.
2. Build Your Own Rain Barrel
Even if you have to buy the plastic drum and all of the plumbing and lumber (but who does that?), you can build this rain barrel for less than $100. The guy that wrote the article actually offered some alternate ways to use this along with different plans.
For instance, if you only want to catch water from a downspout, you can just drill a hole in the barrel and run a piece of pipe from your downspout to your barrel.
If you want to get a bit more complicated and make it so that you can use a hose to get the water out, there are detailed directions for doing it.
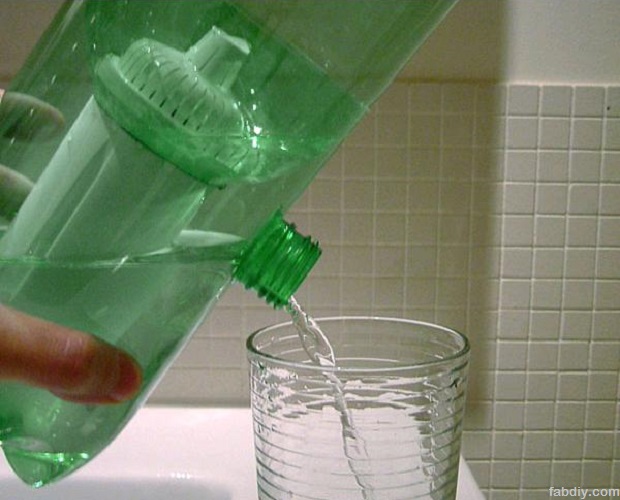
3. Plastic Water Bottle Filter
Water purification tabs are great for killing the germs in your water, but you also have to worry about heavy metals, trace pharmaceuticals and chemicals such as pesticides.
Plain old dirt is rough on the palate, too. That means that you need to filter your water before you purify it.
This project teaches you to build your own personal water bottle filter using only a small water filter and a plastic bottle in about 25 minutes. It won’t cost more than $5.
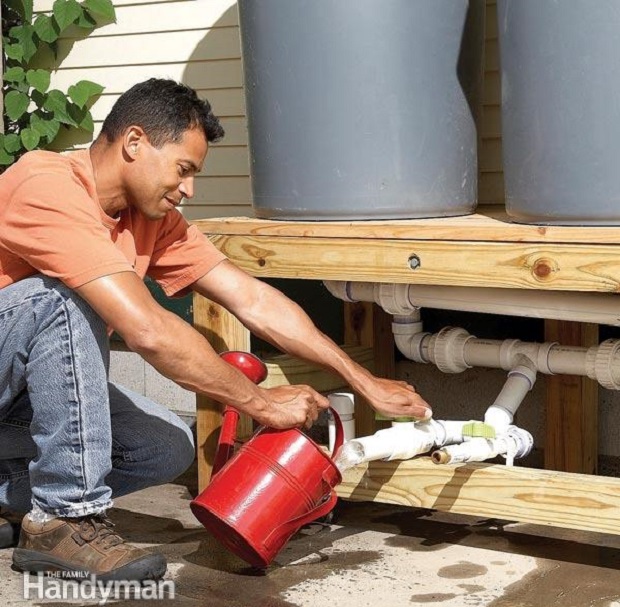
4. Triple Barrel Rain Water Collection System
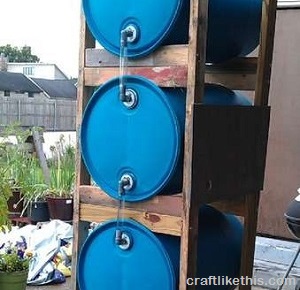
It’s extremely simple to make, doesn’t take up much space, collects 165 gallons of water and has a plan for adding a run-off tank that you can hook a hose to.
It’s doesn’t require much in the way of tools and can be made with very little cash if you have access to 55-gallon plastic drums and lumber.
Triple Barrel Rain Water Collection System
5. 5-Gallon Water Filter System
Commercial home water filtration systems typically cost hundreds of dollars. They also probably won’t work if you have no power, which makes them essentially useless if SHTF.
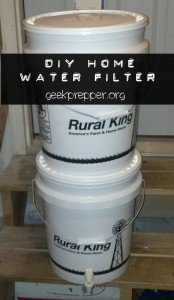
You can build it for less than $100, especially if you get the food-grade buckets for free from a local restaurant, bakery or donut shop. If you’re super handy, you could probably figure out how to modify it so that it hooks it up just like a commercial system.
Personally, this would be cool to have in the barn as long as it’s cleaned out regularly.
5-Gallon Water Filtration System
6. Easy Hand Pump
Are you tired of dipping water out of your collection barrels and carrying it to wherever it needs to go? Would you like for the kids to be able to get water out of the barrels safely and easily?
If so, then this is the project for you. He teaches you how to build a hand pump to get the water from the barrel to a bucket, or you can hook up longer pipe to shuttle it elsewhere.
You only need a saw, a drill and a knife or scissors and it probably won’t cost more than $30. If you’re handy, it won’t take more than a half-hour. If not, allow an hour.
7. Pressure Cooker Water Distiller
This is one of the sturdiest, best-made distilling/desalinating systems that we’ve seen.
As with every other home distiller, it eats up the fuel because it takes a while to complete the process but this one makes it about as efficient as heat distillation can be.
Plus it’s fairly affordable, you can distill several quarts of water at a time, it doesn’t take up a ton of space and the distiller is portable, sort of.
Pressure Cooker Water Distiller
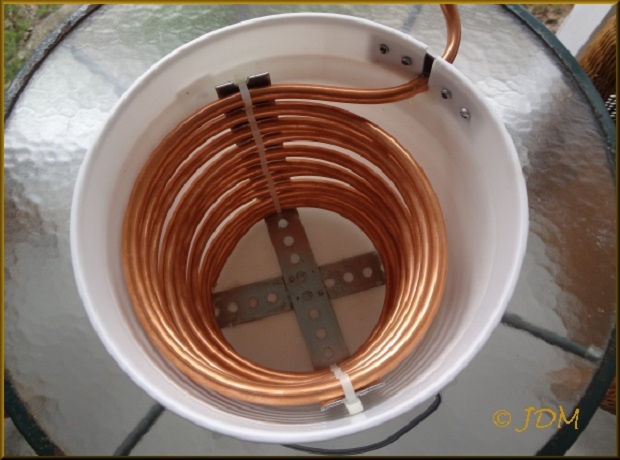
8. Tea Kettle Water Distiller
If you just want to distill a small amount of water on the stove-top then this is an easy way to do it.
It’s affordable to make because all that you need is a tea kettle, a couple feet of copper tubing, a plastic connecter and a rubber coupler.
Again, it takes quite a bit of fuel (2 hours to get 16oz of clean water) but it’s a viable way to desalinate and distill water, at least over the stove.
9. Permanent Solar Still
Typically, when you hear solar still, you think of a hole in the ground and a garbage bag or tarp but this one is made using a painted glass box, pans to hold the water, tubing and buckets to catch the fresh water.
It’s a good system to set up in advance as it takes hours or even a day or 2 to get enough water to do much but it uses the energy of the sun and IS a viable way to desalinate and distill water.
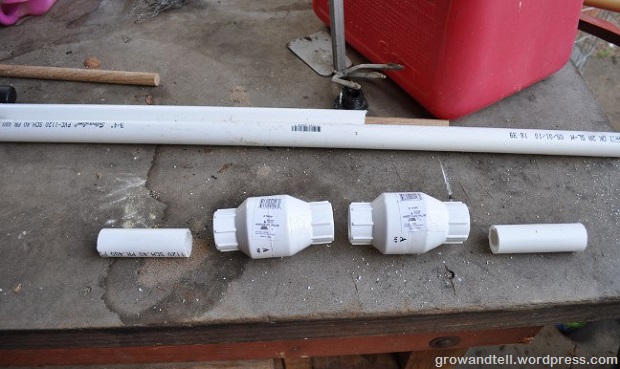
10. PVC Piping and Pump Water Transportation System
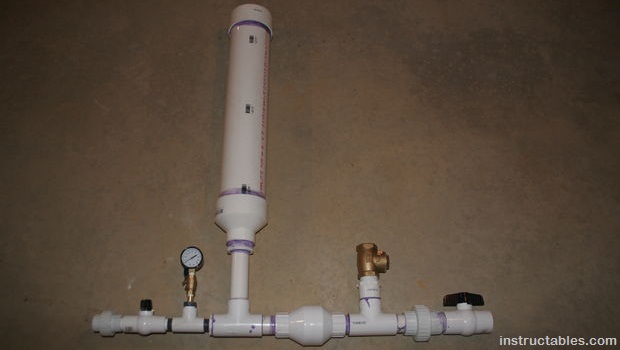
If you live near a river or creek, this water pumping system is a great way to get water to your garden or house without electricity. It’s relatively simple to build and you can do it for around $100, depending upon how much PVC you need. If needed, it will even work over a distance and uphill.
If you’re handy, you can probably modify this to run through a water filtration system so that the water comes to the house filtered, though he doesn’t give directions for that part.
No big deal, though – you can always filter it after you get it to where you need it.
PVC Piping and Pump Water Transportation System
We hope that you found at least some of these DIY projects for your water safety useful and we wish you the best in your prepping efforts.
CLICK HERE to find out more about moving off-grid.
If you have any DIY water projects, please share them in the comments section below, or send us your story and pictures on [email protected] .
This article has been written by Theresa Crouse for Survivopedia.




Bob Kiekenapp | February 16, 2015
|
Thanks for the great information. One can never have all the additional ideas.
Mahatma Muhjesbude | February 16, 2015
|
Well done info, Theresa!
Everybody thinks they ‘know’ how to store water, but until you actually show them what they’re missing, they often don’t quite ‘get it’.
I especially like your mini distiller ideas.
jason | February 16, 2015
|
Thanks, Theresa!
Ed Fox | February 16, 2015
|
How about this one?
Emergency Water Lifter:
If you have a well like me you have water, OK…
If you are on town or city water, you still need one. If you are forced to leave or choose to leave your home in an emergency, where will you go? Another city? No. You will no doubt flee to the country. You will have nothing to offer yourself or anyone else for that matter. You may find yourself knocking on a stranger’s door with nothing to offer them in exchange for their kindness…..unless you have a Water Lifter! You can help your whole community with one or more of these. The Water Lifter will work in countless wells across the country. If you need to bug out, take this with you, and you’ll have a source of clean water any where you go.
I’m not a salesman; this is not some high-tech device. I will use this for my family if I need to. You should make preparations for your family as well. You will need to sanitize this device before you use it as it will be entering and carrying your drinking water. Make sure you are comfortable with doing so.
The Water Lifter is simply a 2′ section of 4′ PVC pipe with a coupling on one end, 2 reducers on the other end, and a sump valve attached to the bottom. Drill 2 holes in the side near the top, loop your rope through the holes, and you’re done. I don’t know how deep your well is, or how low your water table is, but 100′ of nylon rope is included with the Water Lifter. You can make this same thing in a hundred different variations, but all the pieces need to fit together, I spent many hours in the hardware store trying to figure out the most economical and easiest design.
You cannot just drop a bucket into your well, expect it to sink (and fill with water), then retrieve it. The casing is probably 6″dia. and if you have a buckt the small it will float on top of the water. You MUST have a check valve of some sort in the bottom that opens to allow the water in, and closes once it is full. Then, you can pull up a full bucket of water. Also, once you remove the top to the well casing, you will need to remove the wiring and pump/piping going into the well. This is not something you will do for fun. This is something that you will only be using in a crazy emergency situation. However, make sure you have the Water Lifter in your hands before something crazy happens! You can worry about how to get the electrical and plumbing out of the way once the time comes (it’s a bit of a pain to do, but you will only have to do it once).
Pingback:10 DIY Projects For Your Water Safety | Survival skills, survival guns, survival guide - Bulk Survival Food | February 17, 2015
|
Richard Harden | February 17, 2015
|
If you have a pool or spa you have a large storage of water already
Pingback:10 DIY Projects For Your Water Safety - Bulk Survival Food | February 18, 2015
|
Pingback:10 DIY Projects For Your Water Safety | TheSurvivalPlaceBlog | February 18, 2015
|
Pingback:10 DIY Projects For Your Water Safety - TinHatRanch | May 4, 2015
|
Pingback:Back To Basics: How To Make Rum At Home – The Prepper Dome | March 2, 2016
|
Pingback:» Back To Basics: How To Make Rum At Home - Prepper Ways | May 11, 2016
|
Pingback:5 Things To Know About Bleach Storage | Survivopedia | August 23, 2018
|