If you are planning to bug out to a remote location, you probably think about building a permanent home that will remain unnoticed and able to withstand many kinds of attacks. But would you consider that the cheapest survival shelter is also the best? Would you start building an earthbag house?
There’s a reason why the military uses earthbags to make bunkers in emergency situations. Earthbag homes are resistant to bullets, durable, and far less expensive (less than $20.00 per square foot) than using stone or other materials.
If you have not considered earthbag homes, then you may be surprised at how much this tried and true technology has to offer.
Choosing a Place for Your New Home
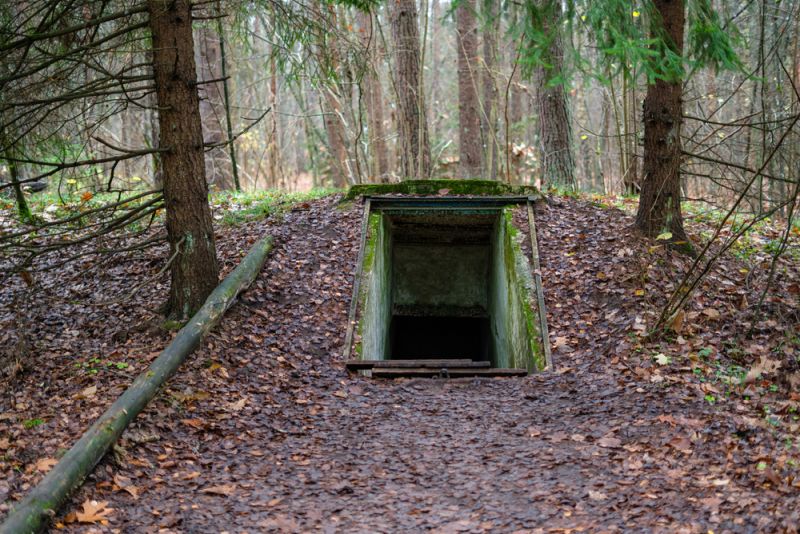
Before you begin building an earthbag house on your property, it is important to choose a good location. Since earthbag structures can include cellars and take advantage of building into the ground, you should look for an area that is above the water table and easily defended.
If you build at the top of the hill, you can also place more rooms underground and then plant fruits and vegetables on the roof.
Creating the Shape and Planning Rooms
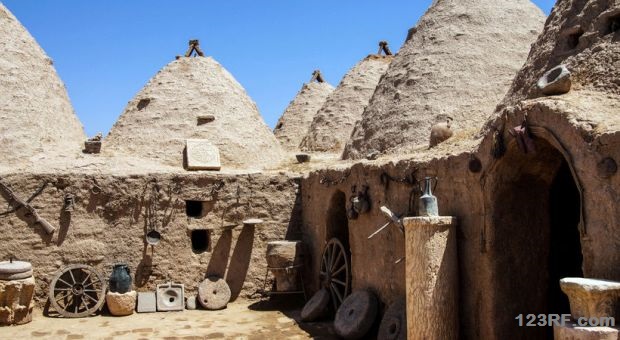
Historically speaking, many earthbag homes tend to have something of an igloo or dome shape. When combined with wire, concrete, and wood frames, you can also build square, rectangle, and other conventional shapes.
If you plan to go with a rounded shape, the walls will curve inward, which will improve strength; but also create unusual room shapes. In many cases, you may need to modify existing furniture or build something entirely new to fit these rooms.
If you have ever driven in an older style Volkswagen Bug vs. a conventional box shaped car, then you will have at least some understanding of how different living in a curved space can be vs a straight one.
When planning rooms for a rounded earthbag home, keep in mind that you will always be trying to draw a balance between wasting room by creating conventional spaces and deciding what you can adjust to in a curved space.
From a survival perspective, you may be best served by going with a rounded igloo shape since it will be more durable and easier to disguise amid hills and other rounded land features.
During the process of planning room sizes, you should also keep in mind the relative strength of the materials being used and the way weight bearing walls may differ in an earthbag home.
Before you commit to any given plan, it is very important to have your plans reviewed by an architect or contractor that has experience in building earthbag homes.
Preparing the Ground and Foundation Elements
As with any other home, you will need to account for water, heat, sanitation, a cellar, and a strong foundation. You can use earthbags in the construction of your cellar and also create underground rooms with relative ease.
This is also an ideal time to build in passive heating and cooling elements. For example, if you are going to rely on solar power for heating, this may be a good time to look for ways to pipe water underground or rely on other heat storing technologies.
Needless to say, you should also make sure that sewage system lines, leach fields, wells, and power sources are in place before you begin construction on the earth house itself.
Securing Materials
Outside of ice igloos in the extreme northern climates, you will not find cheaper construction materials than earth houses.
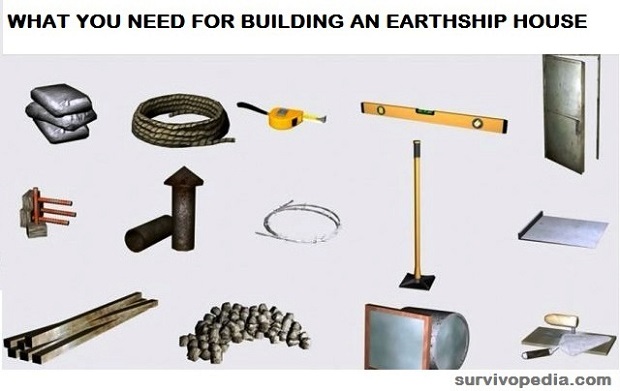
To build an earth house, you will not need much beyond heavy cloth bags, soil, heavy plastic sheeting, and glass for windows, concrete, and wood for framing. If you are planning to store away the items you need on a limited budget you can start by putting aside bags and plastic sheeting, and then concrete, wood, and glass.
It will also be of some help to set aside wiring for electricity, sockets, plumbing fixtures, tubing, and anything else that will make your home comfortable and livable.
Special Roof Features
Unlike conventional homes, you will have a chance to use roof areas of earthbag homes for growing plants and even for defense purposes.
For example, if you build the earthbag home at least 50% underground, the curved roof can easily be planted with vegetables encased in poisonous vines, thorny bushes and other plants. Just make sure that the soil on the roof is deep enough to prevent roots from digging in and damaging the plastic layer on top.
It should be noted that some earthbag dwellers discovered that they had a hard time keeping soil from washing off the plastic layer of the roof. When you use plants in this area, they can easily anchor the soil down with their roots, and also the vines can attach to the surrounding ground. You can also use large leafy plants to provide shade and create a ground cover that will make your home invisible from the air.
When it comes to inexpensive building materials and relatively easy construction methods, few can rival earthbag homes. Even though this technology is often used in emergencies and has been used in military bunkers for decades, few people have adapted it for permanent living.
If you are planning to build a survival home, earthbag homes should be at the top of your list of types to consider.
This article has been written bu Carmela Tyrell for Survivopedia.





Pingback:How to Build the Best Survival Shelter on a Budget | Survivalist Basics | Be Prepared For Anything! | September 26, 2014
|
JGH Boyes | September 26, 2014
|
Writing as former flood warden & civil defence warden in the UK of GB (England) from the ’80s onwards. I have experimented, researched & written up some useful tips & information about sandbagging.
If anyone feel threatened by the use of firearms against them. Then ensure your outer wall is built with bags filled with 1 inch/30mm graded GRANITE rocks/crushed stone no smaller than 25mm grading thru the grading sieves). The wall thickness shall be NO LESS than 1 metre/40 inches deep. This has already been proven since the mid-Thirties, when the British Army conducted tests of the correct thickness of such duly filled (granite filled) sandbags with standing the Browning Heavy Machine gun round from 100 yards.. The Heavy BMG round IS half an inch/ 12.7mm diameter & can easily travel upto 10,000 feet distance. NO accuracy at that distance is assured, but it has been proven FATAL at any distance. Even if you do not have enough earth/sandbags to build such a wall, THEN construct a void wall, into which such media could be tamped into the 1 metre deep void.
The thickness can serve you on MANY fronts, should you need emergency protection from Gamma (or other sort) of nuclear radiation. Then this wall can provide such. The other way that this thickness of wall can further serve you, i insulation from temperature extremes. You can design “dog end” entrance vestibles, which act as 2 door heat traps. BUT keep ALL the walls built, 1 metre thick. Sound absorption, is a 3rd useful asset in the design. You ay drop a loud metallic object inside, but UNLESS someone is less than 10 metres outside. They may not hear you, even then. Never mind installing double glazing (of sorts) into the wall THIS THICK, go the whole hog & do what most German modern houses design for their insulation factor in window design – GO FOR TRIPLE glazing!
Remember, where possible to ensure your roof ceiling is nearly as thick, during bad weather months. The insulation factor counts then. Always make sure your family CAN GET out of the house in more than one way (larger windows).
I shall look forward to anyone who may have questions &/or feedback.
Casey | September 26, 2014
|
How abob building? If you have mud and any kind of fibrous vegetation like grass or staw…and can make mudpies, you can make a cob house. You can use a foundation of rocks and graqvel. Then you make mudpies by walking the grass/raw into mud, picking up wad the size of a football (REAL football! American Football!!!) and lay it like a block on the wall. Then pat it into a bond with the wall that is already standing. Cob housesw are still in use in England (speaking of crappy conditions for a mud home) that have been in continual use for 300 years and more.l I have on three continents. And they have been used on all continents.
A 24′ wall will stop pretty much any small arm, will act as a thermal flywheel to allow you to heat and cool it with minimalist home technology, and without electricity.
As for roofing, I live in Mexico. I would go with palm thatch. Waterproof, insulative, and lasts for decades.
James Burnette | September 26, 2014
|
I will be helping to build a earthship type building an not looking forward to it. Pounding tires sounds horrible. At least It will give me a good workout.
JGH Boyes | September 27, 2014
|
If you rent, buy, obtain a roadworks (highway) air compressor, there IS a special pounding tamper head which can improve the whole tamping process – FAST! There is a youtube video showing a rammed earth wall being built using such. Remember the rolls of barbed wire 2 lines/rows per each sandbag deep of wall. Some people have elected to build their “lead retaining wall” for bullets, with a 12 inch gap. This would ensure slight penetration of ANY spent round.
Pingback:How to Build the Best Survival Shelter on a Budget | TheSurvivalPlaceBlog | September 27, 2014
|
Blue | October 3, 2014
|
While sand bags are nice, what we in the military use now is even better. we have all but forsaken the traditional sand bag for Hesco barriers. Hesco is the brand name, and I am sure that more than one of our esteamed leaders have stock in the non-publicly traded asset, and is a very simple design (honestly, someone did deserve to make a few million on this stuff).
The barrier is simple – it’s basicly hog fenceing that is put together with hog/goat fence spiral wire to form an open topped box. The box is lined with a “felt” over cardboard (the smaller boxes use cloroplast-a PVC pannel used to make signs). The box folds flat and when built, is filled with whatever rocks/dirt/sand is available. The next course is built, useing the spiral wire to connect each course, and is repeated. I have lived in areas that were built with 14′ high walls, 4′ thick with metal shipping pallets over our heads and took rounds from AKs, mortars, RPGs and 12mm machineguns… It did get dusty but nothing penitrated…
This set up would be easy to replicate as a square foundation, but it would need to be topped off as to not let rain/snow into the boxes.
JGH Boyes | October 3, 2014
|
A little background from this Limey, about Hesco bastions. Invented (or re-invented, depending upon your historical perspective) by a British de redundant & seeking new work came up with this idea for major civil engineering works in the UK. Naturally, the British army Sappers, attend the same trade shows as construction & civil engineers do. They did a little lateral thinking & hey presto! They become lead & missile warhead retaining walls.
Hesco, have also developed an relief aid house, using the very same walls & heavy tarpaulin roofing over a frame. One project I have seen completed in England, required a finish bastion wall to be rendered and finished to native local rock appearance. This was achieved, using plastering lathe mesh & shotcrete over it. Then local tradesmen finished off the moulding to local rock pattern. To the uninitiated, you believe your looking at a small cliff face.
There IS a more budget minded version, found Alibaba. Keyword search:- Bastion gabion.
Great Grey | October 4, 2014
|
But how do you build one if you don’t have access to modern plastics? I.e. horse and buggy time and you don’t have a horse.
JGH Boyes | October 4, 2014
|
The answer has been used FOP CENTURIES before modern materials were invented & developed. What Americans call burlap, we Brits call Hessian. The British army STILL USE hessian sandbags, impregnated with a close chemical relative of Cuprinol ( copper based antifuncide, hence the 1st 2 letters being the chemical Cu ). They are rough woven weave, as (plenty of) experience has already proven to generation of “thin Red coat” troops, these mesh together & lock against blast & seismic shock.
At the end of the day, it comes down to rather basic “grunt” manpower in heavy labour. But good previous planning,some knowledge of local geology & ground water conditions, are perhaps going to be your best weapons. Sandbags had always one major facet in their design, their mouths were meant to accept the shovel blade feeding them!
If you do not have a builders tamper. Use a piece of sawn (& plained to avoid splinters) length (1 metre+) of 4 by 4 or 6 by 4 timber. Makes sure you use builders line or cord string to build the walls to. The 2 strands of barbed wire to act as reinforcement/”mortar” key between layer, still stands. The thicker the wall depth, then the more double lines of barbed wire laid across that depth.
AS I mentioned at the start of my reply. If this defensive method of physical protection has been practiced for CENTURIES, then there MUST BE SOMETHING in it.
For those burrowing below ground, then sandbags can be easily used for a variety of purposes in the excavation work. Removing spoil without generating huge mounds appearing nearby. When using mechnical methods with plant below ground, sound dampening is essential. If you unexpectedly hit ground water, then flood management comes into play. If parts of the work is being readied for habitation living. Then a sandbag wall can control dust & contaminated air, from entering such parts.
One tip which I pass on from British military manuals, about field sapper trenching & sandbag wall construction. It is recommended for walls over 2 metres high, that you use 4 in 1 above ground, & 1 in 4 below ground – as gradients. In plain English, for every 4 feet above ground the wall rises, then it should be tamped to a slope gradient going back 1 foot However, sandbagging trenches this rule is reversed. The exception to the trench rule, is when reinforcing of the wall is used. (We Brits used to put expanded metal mesh against the trench wall & rammed angle metal stakes against the mesh. Some deeper trenches, used to have more angle meal stakes driven into the wall to pin the expanded metal mesh).
I hope this helps?
Great Grey | October 4, 2014
|
Fine if you have bags but, they are still man-made and may not be available. As for tamping even a walking stick will work, just takes forever, two or three bound together so the don’t shift would be better. Hopefully things don’t get that bad. Some kind of adobe work maybe need instead, maybe poured in shallow layers or, a double wall filled and tamped.
Then there’s soil type and that always affects what works best.
Zade | March 25, 2018
|
I think Great Grey is thinking about waiting till the Disaster happens before getting ready. On the other hand, Cindy and I are building a couple of these shelters now. We also have a quantity of bags stashed, along with Bentonite Clay and Portland Cement, to use as additives. Get ready now, so You don’t have to struggle as much.
Pingback:What To Ask For From A Lifesaving Shelter | Survival skills, survival guns, survival guide | December 5, 2014
|
Pingback:What To Ask For From A Lifesaving Shelter | The Prepper Dome | December 5, 2014
|
Pingback:Straw Bale Construction: Pros And Cons-The Prepper Dome | July 2, 2015
|
Pingback:How To Build The Best Survival Shelter On A Budget - | September 7, 2015
|
Pingback:How To Build The Best Survival Shelter On A Budget - MilitiaTV | September 7, 2015
|
Pingback:Black Legion Militia | How To Build The Best Survival Shelter On A Budget | September 7, 2015
|
Pingback:Cloroplast Signs | Home | April 9, 2016
|
Pingback:How To Make Survival Cement | Survivopedia | June 22, 2016
|