Disclaimer: As with all articles involving medical and or legal issues, please do not misconstrue anything in this article as medical or legal advice. Neither the publisher nor the author accepts any liability for the use or misuse of any information in this article.
Tip #11: Add Flat-packed, Compressed, Sterile, Z-folded Gauze
This product packs 4.1 yards of 4.5” wide into a compact package approximate 2” wide by 4.5” long by 3/8” thick, which is much easier to pack than roller gauze. It can be used as a roller gauze, to create gauze pads, to pack wounds or apply pressure or compression to wounds or other injuries, enabling this versatile material to treat a range of injuries.
The same amount of compressed, z-fold gauze was issued in the U.S. Army IFAK and the U.S. Airforce 2-part individual survival kit.
Tip #12: Add Hemostatic, Sterile, Z-folded Gauze
Another component included in the U.S. Airforce 2-part individual survival kit is QuikClot® Combat Gauze®, which is a vacuum packed, z-folded strip of hemostatic gauze that is 3”-wide and 4-yards long. It can be packed into or applied to wounds to stop uncontrolled bleeding that cannot be stopped by direct pressure alone.
Tip # 13: Add a SWAT-T™ Torniquet
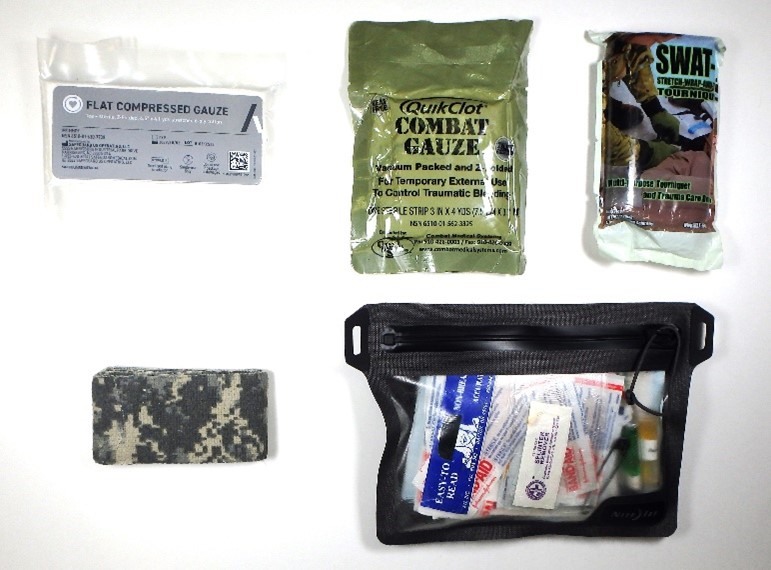
The SWAT-T™ is an excellent choice for survival medical kits because it can be applied higher in the armpit than other tourniquets, has multiple survival uses (including a power band for a Hawaiian spear, slingshot bands, propulsion for a water wheel on an otter board and more), and it is compact and packed flat, so it stores well in kit, pouches, and pockets. It can also be used as a pressure bandage, which is creates fewer complications than a tourniquet in an austere setting.
Every 2 hours a torniquet is left in place, the patient’s prognosis becomes more serious until 6 hours, when amputation is typically recommended. Successful removal of a tourniquet often requires corrective surgical intervention to stop the hemorrhage. In a survival ordeal, the tools available to stop bleeding may be very limited and their use often requires substantial medical training to achieve a desirable outcome.
Tip #14: Add McNett CamoForm® Tape
I learned about this tip from 2-part U.S.A.F. issue individual survival kits. CamoForm® is far better 3M® Coban® for survival use. For one thing, Coban® and similar self-adherent medical tapes don’t store well in survival kits, especially those carried in pockets because it fuses to itself when it gets crushed, can’t be reused, and must be cut off. If the roll gets crushed before it gets used, it’s useless.
CamoForm®, on the other hand can be used and reused, is multiuse, and can be used to apply direct pressure to wounds to control bleeding.
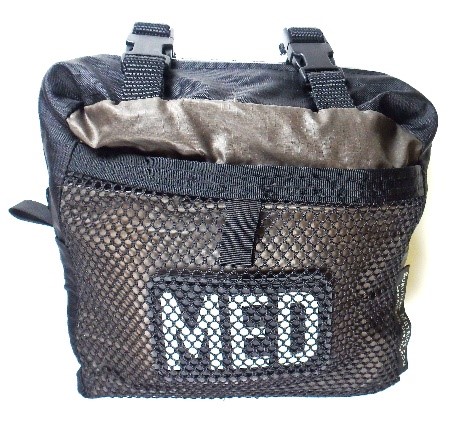
Tip #15: Pack Your Survival Medical Kit in a Water-resistant Pouch or Case
A survival medical kit will not help much if the contents get wet or the kit sinks and is lost.
Tip #16: Add Oral Rehydration Salts, Graduated Plastic Bag, Antiemetic, Antidiarrheal
Dehydration is difficult to avoid in many survival ordeals and can create an emergency within the emergency. Any disaster that disrupts power typically also disrupts the city water supply. Earthquakes and increased demand on a city’s fire hydrants in large fires can both stir up sediment in the water system, resulting in muddy water at the taps.
Drinking contaminated water results in waterborne illness, which in turn causes nausea, diarrhea, or both, accelerating dehydration, which is usually the cause of death due to waterborne illness. Antidiarrheals and antiemetic medication can often help prevent or slow fluid loss from diarrhea and vomiting. Used in combination with oral rehydration therapy with oral rehydration salts (ORS), they can help restore fluids, salts, and electrolytes.
Dehydration is a common feature of survival ordeals because survivors often push themselves past the limits of endurance attempting to search for and rescue other party members, in casualty evacuations, or in attempts to affect self-recovery. Even with an adequate supply of water, salts and electrolytes are lost through excessive sweating and labored respiration in both hot and extreme cold conditions. Eventually, the individual cannot drink anymore water, and may feeling nauseated at prospect of drinking any more water. They can, however, sip oral rehydration salts or dilute sports drinks. With rest and oral rehydration therapy, recovery is often achieved.
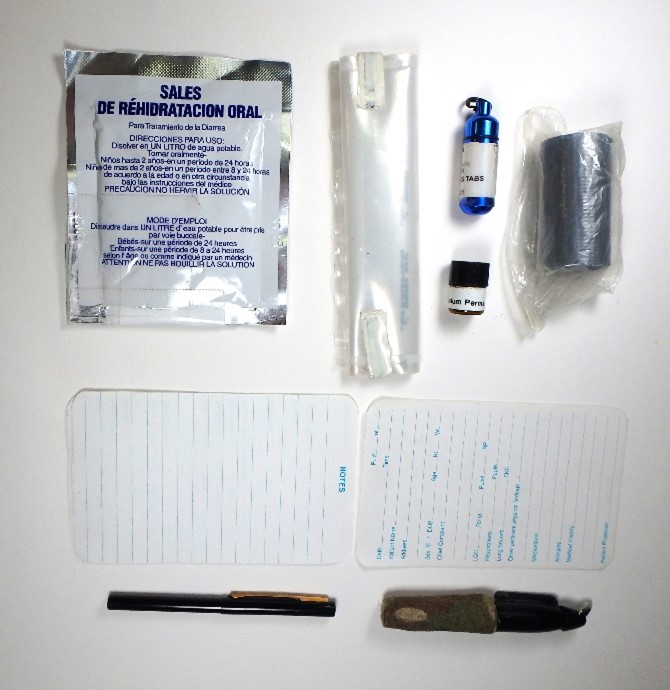
If you run out of ORS and would like to make homemade version of the reduced osmolarity ORS recommended by the WHO, the recipe is:
- 3/8 teaspoon table salt
- ¼ teaspoon potassium chloride salt substitute
- ½ teaspoon baking soda
- 2 tablespoons + 2 teaspoons sugar
- Add potable water to make 1 liter of ORS.
When improvising ORS, care must be taken to not exceed the amount of salt indicated in the recipes. Excessive salt results in hypernatremia or salt poisoning, which can damage the kidneys. Most of the symptoms of hypernatremia also present with dehydration, making it is easy to mistake hypernatremia for dehydration. So, take care not to add too much salt.
Sugarless drink powder can be used to flavor the mixture. Using sugared drink mix would increase the amount of sugar. This is especially helpful when trying to get dehydrated children to drink ORS.
As an interesting side note, potassium chloride is a salt substitute that you can find at health food stores often recommended for low sodium diets. It is also a high explosive precursor because it can be converted to potassium chlorate through electrolysis. This can be accomplished by constructing a chlorate generator with a platinum electrode.
If you don’t have all those ingredients on hand, a substitute can be improvised from:
- 2 tablespoons sugar
- ¾ teaspoon salt
- Add the measured quantities of sugar and salt to 1 quart of water.
Adding half a cup of orange juice or a little mashed banana will add potassium. While most beverages other than water contain some electrolytes, alcoholic beverages, coffee, tea, and hot chocolate are less effective because they have diuretic properties. Soups and fruit juices are generally helpful.
Tip #17: Consider Adding Prescription Analgesics
I am not of the opinion that everybody should carry firearms, powerful narcotics, or dangerous chemicals, but all of these can and have saved lives in the hands of responsible adults with adequate training.
Study survival for even a short time and you will understand the importance of the will to survive. Severe pain can be debilitating. Some medical professionals insist pain does not kill, but there should be no question that any condition that causes debilitation during a survival ordeal can mean death, and you probably won’t be concerned with splitting hairs over whether the cause of your death was direct or indirect.
Most survivalists carry a trauma kit, but vendors can’t easily include pain medication because it requires a prescription and must be tailored to each patient and situation. Plenty of survivalists add painkillers to their trauma kits but may not list them when they share contents lists. If you carry them, you should be thoroughly trained as to their appropriate use, abide by the law and your physician’s instructions, store them like you would a loaded firearm, and don’t advertise the fact that you carry them.
Tip #18: Add Medical Reinforcement Tape
Medical reinforcement tape looks and feels like a small roll of duct tape but features materials and adhesives appropriate for use on human skin.
It is used for holding chest seals in place, sealing water and dirt out of dressings, reinforcing dressings, immobilizing impaled objects, immobilizing orthopedic injuries, immobilizing patients with possible spinal injuries on backboards, reducing friction to hot spots and blisters and pretty much anything else you need heavy duty tape for. Just think twice before using it on the face or other areas of tender skin, especially together with benzoin tincture as it has been known to take off more than just hair when removed.
I’m sure it makes a certain type of person feel tough to use duct tape, but if you have reaction to the adhesive, it can do more damage than the injury you were attempting to treat, and a survival ordeal is no place to figure that out. So, whatever reinforcement tape you pack in your kit, try taping a piece somewhere tender for a day to test for a reaction before you need it.
Tip #19: Consider Adding Potassium Permanganate
Potassium permanganate is worth including in pocket survival kits and survival medical kits because it is multiuse and takes up very little space. Potassium permanganate can be used for water treatment, as a topical antifungal, topical antiseptic, oral antiseptic, antiseptic wound wash, to fake certain illnesses to receive medical treatment, to start a fire (in combination with glycerin, propylene glycol antifreeze or sugar), and can be used to make effective emergency signals on snow. For more information on potassium permanganate, see my article on the subject.
Tip #20: Add Paper, Pen and a Sharpie® Mini
A Sharpie® mini permanent marker is useful for circling the edges of skin disorders (this makes it easier to tell whether it is growing or shrinking), write TQ and time of application when torniquet is applied, note the administration of prescription analgesics, the dose and time of administration, give you a way tag triaged patients in mass casualty incidents, and more. Sharpie® permanent markers write on most surfaces, including skin, and the mini is the smallest size.
You may also want to include a small pen such as the Stowaway by Fisher Space Pen® in Figure 3. It is very compact and features a nitrogen pressure ink cartridge so it can write on most surfaces (including water-resistant paper) upside down, under water or even in zero gravity.
The water-resistant patient treatment/note forms in Figure 3 are made by Rite in the Rain®. I removed them from a notebook, trimmed the top and rounded the top edges so they will last longer in a survival medical kit. Treatment records record patient and treatment information and help ensure information is not lost when the patient is transferred.


























Link to first 10? 😉