Solar chargers collect and store the sun’s energy so it can be used later on to charge small electronics that are often tremendously useful aids to survival.
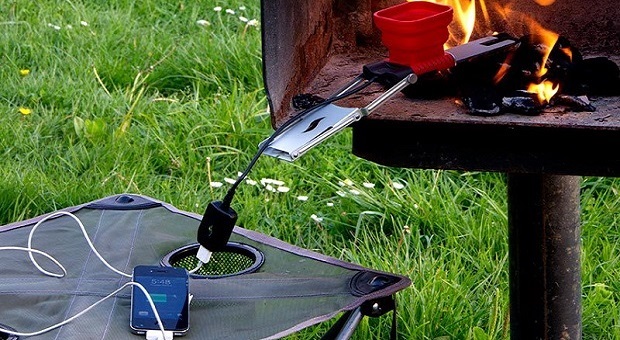
As we have already demonstrated, you can recharge many small devices using solar energy for as little as $30. Unfortunately, the smaller models also have significant limitations that preppers need to be aware of.
For example, most chargers use small solar panel(s) that cannot fully charge the unit’s battery in a single day of sunshine. This makes them fine for topping of the charger’s battery or using them to recharge your phone while you are away from AC power for the day, but a poor choice for constant use such as charging multiple pieces of equipment simultaneously in an emergency.
Second, most small solar chargers do not have variable power output. There are a few models that do, but they are considerably more expensive. Maximum output varies by model and is pretty low. So while they may be able to charge a headlamp or a cell phone, they cannot charge large banks of small batteries or larger electronics such as most notebook computers and radio gear.
Portable Solar Solution
A good portable solar setup can do things that a pocket-sized device cannot, such as charging a car battery, running powerful portable ham radio equipment, drive fans, drive pumps, power electric hand warmers, charge banks of small batteries or charge several smaller devices all at once.
It can be a single “black box” that has the necessary components integrated into one product or you can buy the individual components separately. They are most often something in between, so you can mix and match solar arrays and batteries according to your needs and maintain a degree of modularity to prolong the life of the equipment in light of the fact that technology will change.
Whichever you choose, a portable power solution provides an enormous amount of flexibility over smaller integrated USB solar devices.
Whether manufactured or built from components, most are modular in design so you can use larger or smaller solar panels or batteries in order to meet your needs.
Portable solar systems have the same principal components:
- Battery (Stores electricity)
- Power Output (USB Port, Auto Cigarette Lighter Receptacle, PowerPole Connector)
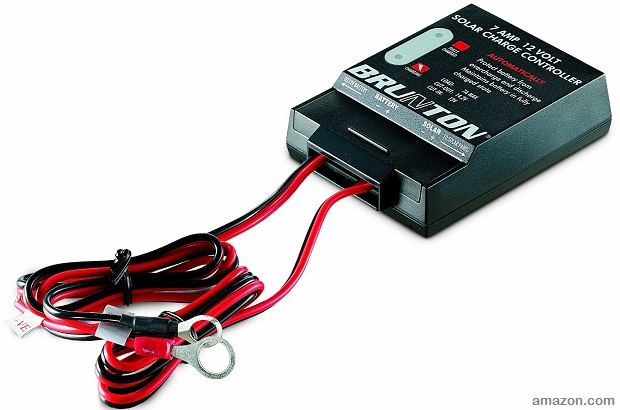
- Charge Controller (Interrupts flow of power from the solar panel to the battery when full or too hot to avoid damaging the battery)
- Solar Panel (Turns solar energy into electricity)
By choosing larger and smaller components, we can generate more power or store more power. The battery or battery bank stores the energy generated by the solar panels or array of them. The solar charge controller ensures that we do not damage the battery as the solar panels charge it.
Buy or Build?
If you prefer to purchase a solution there are many to choose from. You can buy a production model or even have a small business build to meet your needs. Buying is more convenient, but also usually costs more. It is OK to be a driver and not a mechanic, but most self-reliant people like to be able to maintain and repair critical equipment.
Greater than cost savings, for many, is the fact that doing often teaches us things that we cannot learn in any other way. Survival reigns supreme amongst DIY pursuits, and the process of building is educational.
Even if you value convenience over thrift, you should still understand your alternative energy system well enough to maintain it. You will not likely be able to send equipment back to the factory for repair if the grid goes down. If your concern is convenience, building your own alternative energy solution does not actually involve building anything. In many cases, all you need to do is read a little and plug in a few wires.
Whether you buy or build, you will still need to evaluate features. So I will go over the most critical points for each component. I will address solar charge controller and power outputs under battery as they are sometimes integrated.
Key Components
1. Battery
The battery capacity must exceed the draw your equipment demands from it. Select a battery with at least 50-100% greater capacity than you think you will need. You solar power generator will not be 100% efficient and the sun will not always cooperate with you. So keep in mind these about the battery:
- Battery technology & portability: For this application, you will want a Li-ion battery. They are lighter, smaller, and typically last more charge cycles when deeply discharged. If weight does not matter, you can use larger, heavier, less expensive battery technologies.
If you discharge a typical li-ion smartphone battery completely (100%) each time before you charge it, after doing this about 250 times, the battery will last about 75% as long as it did when it was brand new. Manufacturers very conservatively consider this the end of the battery’s useful life. It will still work, but it will not last as long. How do you make it last longer? Don’t discharge it completely or buy much larger battery bank than you will need so you do not have to discharge it deeply.
If you only discharge a Li-ion battery to 50% of capacity instead of 100% (complete discharge), it will last 1200-1500 charge cycles. Discharge it only 25% and it will last 2000-2500 cycles. Recharge it after 10% and it will last 3750-4700 and you could use it every day for 10-12 years and it will last 75% as long as when brand new. Heat also shortens battery life so keep batteries cool and trickle charge them as opposed to rapid charging them. - Battery size: Calculate how much current your equipment will draw. This is not difficult and much has already been written on the subject, so I will not repeat it here.
- Solar charge controller: This is needed to protect the battery against overcharging. Some batteries have one built in and some do not. Either is fine, but you need to be aware of whether or not the battery has one built in since you do not want more than one. If a charge controller is not integrated into the battery you buy, you will need to get one that matches the output of your solar panel since they come in different sizes. They are installed between the solar panel’s output and the battery’s input. If the adapters do not match, you can crimp on adapters that do.
- Charge state indicator: This is essentially a “fuel gauge” for the battery. It can be an LCD, series of LEDs, single LED or gauge that tells how capacity is remaining in the battery.
- Variable power inputs: As supplied by the factory, many battery packs can be charged from a wall outlet, cigarette adapter or USB port in addition to a solar panel. These are power inputs. Consider how you plan to charge and maintain the battery before an emergency. It is convenient to be able to charge the battery from your home and vehicle without having to use the solar panel when you maintain it in between usage. Even if multiple inputs are not built in, you can still use a converter or adapter, but they add a little bulk.
- Power outputs: This refers to the type of plug and how much current your devices will need and is typically expressed in voltage milliamp hours. They are often built into batteries along with a charge controller. Consider how power is input to the devices you use. Then consider other capabilities you might need in an extended emergency. If all your gear has 5v USB inputs, it’s best to get a battery with 5v outputs. Otherwise you will have carry an adapter to make the output usable for each device and it will decrease efficiency.
Some Li-Ion battery packs come with variable output which enables you to vary the output voltage and amperage. This is a great feature because it eliminates having to carry a different power adapter for every piece of equipment. You may still need adapters.
I swap my 12v DC equipment over to the same type of genderless connector called the Anderson PowerPole connector. This simple modification is performed by stripping and crimping power cables. If you can do that, you can drastically reduce the number of cables and connectors needed to run your gear off the same type of connectors.
- Consumer Ratings: Even if you buy locally, it is still worth the trouble to checkout product ratings online before you buy.
2. Solar Array
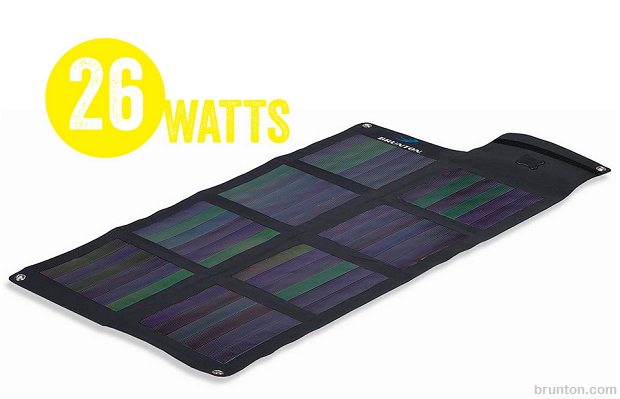
Years and years ago, (well over a decade) I shelled out around $375 for a Brunton Solaris 26 portable solar array that I still use today.
Unfortunately, inflation has practically kept pace the price drop in flexible (thin film) solar arrays so they aren’t a whole lot cheaper now than they were a decade ago and you can probably find the exact same product still available for sale for about $300. They are very durable and don’t have moving parts so they are pretty rugged.
The Solaris 26 folds up to the about the size of a notebook computer and unfolds to about 2 feet x 4 feet and has grommets in the corners to hang it from a pack, tree, tent or vehicle. I chose this model because it outputs 26 watts at 12v DC and I wanted it to be able to charge car batteries, gel cells or the considerable more expensive, larger and heavier Li-Ion battery packs of the day in order to run amateur radio equipment, small electronics, cell phones and notebook computers at that time.
Today, lighter Li-Ion battery packs with variable output are available. This is a boon to anyone planning to pack in this type of gear on foot, bicycle pack animals or using carts or other small transport.
What to look for in a solar array:
- Technology and Portability, 1st Gen vs 2nd Gen: What are your size and weight constraints? If it needs to fit in a pack, you will probably want Gen 2 Solar panels. If it will be mounted to a vehicle, Gen 1 would be better. Gen 1 panels are the heavier glass ones, Gen II are the light, flexible thin-film ones. Gen 1 is a little more efficient in bright sun at lower latitudes and with optimal orientation, especially on a mount that tracks the sun, and are cheaper, and they are heavy. Gen II is more efficient in Northern latitudes, on cloudy days, with imperfect orientation and are more portable.
- Output Current: For solar panels, this is normally expressed in voltage and wattage. To determine how much output you need you need for a particular application, you will need to calculate your electrical load and how long you will run it, but in practical terms, for a portable solution, you may have to start with what you are willing to tote around and work back to how much you can use your gear from there because how often you use your equipment is negotiable, how much weight you can carry before you start making soft compromises is less so.
A 100W, 19v array is the largest you would want to pack, 50 watts or 25 watts at 12v still gives you plenty of power for what most people would normally carry in a pack. If you just bring a cell phone and maybe a headlamp, you can get by with an integrated device that produces a few watts and can fit in your pocket like the ones discussed in Part 1 of this series.
How do you determine the wattage and voltage your panel should be rated for? You need to be able to charge the battery. So for voltage, if you determined a 5v pack is best because your devices are USB, 5v will be most efficient. If you chose 12v or 13.8v for radio equipment or 19v for a notebook computer, the same thing goes. It is most efficient and less confusing at this stage to choose a panel with output that matches the voltage of the battery.
In determining the wattage, you will need to be able to bring the battery back up to full charge with the usable sun you have per day which averages about 6-7 hours on a sunny day, typically from 9:30am to 3:30 pm, but this differs somewhat by latitude and generation of solar panel.
- Ruggedness and water resistance: What environment will you be using it in? Best case, equatorial desert and you shelter in when it rains, which is infrequently. Worst case? Torrential rains, high latitudes, 100% humidity, perpetual cloud cover, on a small boat constantly exposed to salt air. You also need to consider if you will constantly moving and how much of that movement will be in a straight line. Best case is you can use it in a secure camp where no one will try to steal it.
- Consumer Ratings: Don’t forget to see how products performed for others before you buy.
You’re still unsure about the steps to proceed for building the energy stockpile for your homestead? Well, we have already thought about this, and the next Survivopedia article on this topic is on its way.
Stay tuned for the next part of our series on how to build your energy stockpile for survival.
This article has been written by Cahce Valley Prepper for Survivopedia.






Dwayne | July 10, 2015
|
One suggestion that I have is you purchase a small complete system, then put into a faraway cage to protect against an EMP attack. This way if the grid goes down you will be able to generate some power.
K Duryea | July 10, 2015
|
Faraway cage will be useless if Russia or any of their co-harts go EMP on use, as they are 100 times more potent than the rated cages were tested for. I read the last several years, Russia has uped their game in EMP effectiveness, so that being said, I guess if one could find some lead blankets, used in the Nuclear industry that might offer the best option. Just my opinion.
Great Grey | August 11, 2015
|
First Faraday cage is describing a type of device, not single spec. device, therefore assuming someones cage won’t work is baloney. A lot depends on how well ground it really is. A bad ground can be worse then having it ungrounded. The amount of moisture in the soil around your grounding structure has a big bearing on that, so after a long drought you may not be as well grounded as you thought . And you can layer your protection. Put what you are protecting in box wrapped in foil, in another box wrapped foil and repeat until you get the level of protection need and be sure there is no electrical connection between each layer. Then put it in your cage. You don’t have to have 100% effective to protect you device. Each layer will reduce the remaining strength x%, so 3 or 4 nested layer should be good. Microwave oven have a problem in that they will only block frequencies of microwave length or longer that is why you can see through the screen in the door, as light waves are shorter.
Rick | July 10, 2015
|
I would like to know on any kind of electrical
device being discussed if it will withstand an EMP without protection of a Faraday cage.
Pingback:Building Your Energy Stockpile: Make The Sun Work For You | TheSurvivalPlaceBlog | July 12, 2015
|
Pingback:Checkmate To Danger: Here’s How To Always Win! - Survival By Preparedness | December 11, 2015
|
Pingback:The War On Coal: Going Green On Energy | Survivopedia | August 30, 2016
|
W.V. Bonds | November 18, 2016
|
Refer Rick from July 10, 2015. You are nothing but snake oil salesmen. If we get a major EMP, then the freaking relay towers are going to be burned also. Cell phones will make fair fishing weights.
I still have my CB tower, unit, solar chargers faraday cage on PU battery. Maybe I can cobble up something in the for communication equipment.
Pingback:How The World Would Change Without Fuels? | Survivopedia | June 22, 2018
|