Though there are many different methods of preparing meat for long-term storage, without a doubt, canning it is the easiest way to store large quantities of it in a manner that gives you an almost eternal shelf life.
Canning meat off grid is pretty much the same as if you do it in the modern fashion; as a matter of fact, if you have solar power, you can probably use the same methods that everybody else does.
It used to be considered safe to simply can your meat in boiling water baths but that’s not the case anymore. If you’re near sea-level where the boiling point of water is the highest, you MAY be OK to can your meat using the water bath method as long as you keep it at a hard boil for at least three hours. Even then, there’s no assurance that it will be safe to eat though our older generations did it and seemed to fair ok.
The recommended method of canning meat (and low-acid vegetables) is to use a pressure canner. This is because of the high risk of botulism. Botulism is a type of food poisoning that can quite literally kill you if you get it.
It affects your central nervous system and causes facial and/or body paralysis, difficulty breathing and swallowing and other not-so-pleasant reactions. Needless to say, if you can’t breathe, you’re going to be in a bit of trouble.
Botulism is caused by the bacteria Clostridium botulinum. This bacteria is extremely difficult to kill with the average heat that is used in water bath canning and can live without oxygen in your jars. As a matter of fact, it produces oxygen, which is why you should throw out any canned foods that have bulging lids or bubbles or foam on the top or up the sides when you look at the jar.
We’ve gotten a bit astray, but I wanted to really drive home why it’s critical to can your meat using a pressure canner instead of using a water bath. Now we can proceed with the actual methods of canning meat off-grid.
Materials Needed for Canning Meat
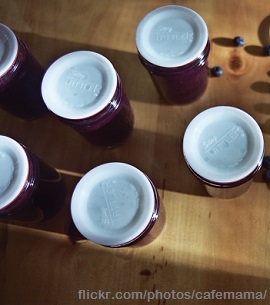
There are now a couple of companies that make lids that can be reused almost endlessly, so even if they cost a bit more, they’ll pay for themselves many times over. The reusable lids that I’ve used are Tattler brand. The second good thing about them is that they’re BPA-free.
When using these lids though, there are a couple of differences between them and the standard lids that you’re probably used to. When you put the lids and rings on the jar, you need to unscrew the lids a quarter of a turn in order to allow the hot air to escape while the contents are processing. Once the jars of food are processed, remove them from the canner. As soon as you do this, tighten the rings back down so that the rubber can seal correctly as the food cools.
When it comes to reusing your jars, always make sure that you thoroughly clean them and inspect them for any flaws. If there is even the slightest chip anywhere, especially along the mouth, then use it to store your dry goods or other items that don’t require a seal.
You’ll also need a pressure canner. The good thing about a pressure canner is that you can use it as a water bath canner for all of your fruits and veggies that aren’t low acid.
Canning without a Stove
This is where it’s going to get a bit tricky. If you have an old-fashioned wood-burning cook stove then you’re in a much better position to can foods, especially if you’re pressure-canning them. Remember one thing though – if you’re without power, that means that you’re without air conditioning so canning inside is going to turn your house into an oven in the middle of the summer.
Though many people say that pressure canning over an open fire is impossible, it’s really not. That’s not to say it’s easy because it’s not, but it IS possible. You’re going to need A LOT of wood because you’re going to need to keep your fire hot enough to sustain the pressure inside of the canner.
If the water quits boiling for even a bit, you’ve already lost because the meat needs to stay under pressure for the amount of time necessary (it will vary based on the size of your jars) in order to kill botulinum bacteria.
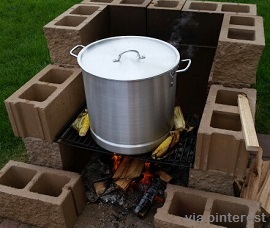
You want to start with a really hot fire; your canner will pressurize much faster that way. Also, have a big supply of wood handy; remember that if you’re canning multiple batches, this is going to turn into an all-day (or even all week) job. Green beans need to process under pressure for about 25 minutes if you’re using quart jars. Quart jars of meat needs 90 minutes of processing!
Your canner can only hold so many jars, so if you’re doing multiple batches, prepare to have enough wood to keep that fire hot for several hours. You’re going to have to watch your fire closely. You want it hot enough to bring the pot to pressure but not so hot that you blow it up!
Another good tip that I read from somebody else was that if you’re sterilizing your jars outside, put a lid over the pot; otherwise ashes will get in the water. The last thing that you want to do is add extra work to an already excruciatingly long process!
Be extremely careful when you’re canning over an open fire. It may be best to start with some water bath canning so that you can get a feel for how much wood it takes to keep the water boiling but not overflowing, etc. Then after you get a better feel for the process, move up to pressure canning.
Just because you don’t have electricity doesn’t mean that you’re unable to can your foods. Oh, and one final tip that my mom taught me when I was a kid and we were camping: if you put dish soap on the outside of your pots when you use them over an open flame, the black soot will come off much easier! Don’t you just love tips from mom?
This is a fairly new topic in the world of off-grid living so if you have any comments or experiences to share, please do so in the comments section below!
This article has been written by Theresa Crouse for Survivopedia.





Clem | September 14, 2015
|
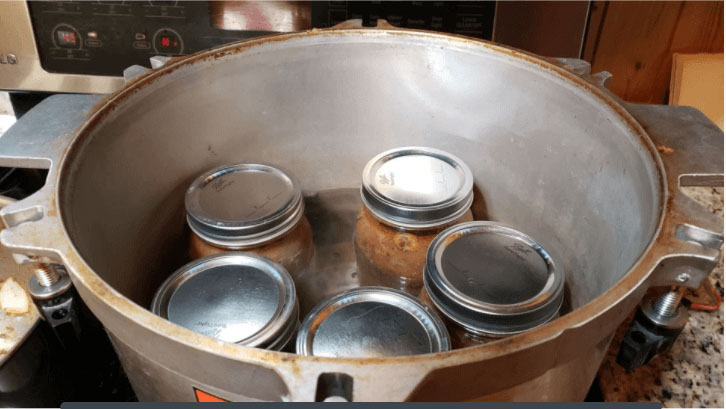
Please note, the canner pictured with the article is NOT a pressure canner. It’s a water bath canner.
CLAY | September 14, 2015
|
Yes, I saw the canner and wondered where the “pressure” gage was. Is water canning easier or more difficult???
Jim steed | September 14, 2015
|
Thank you for a thorough and enjoyable article. It’s slways good to give a reality check as many can get an idealistic view of what something is, then quit when the reality doesn’t match it! My family is from Tyler County, WV, btw!
Dr. Clifford N. Alford | September 14, 2015
|
I watched my grandmother do this sort of thing about fifty years ago, and got what I needed to try my hand at it this year. Thanks for a very timely article with some things I didn’t know.
Andy Woods | September 14, 2015
|
Great information. Thanks!
Donald Willey | September 14, 2015
|
I really enjoy all the Survivopedia articles, and I copy a lot of them…like this one, and put into a folder for later use. Sorry I don’t respond more, but usually have nothing to add! I have suggested before, and will again…it is very useful to have two or three “Puck” lights…use 3 AAA batteries, when the lights go off at home, especially if your needing to shower, or make some lunch!!
Don St. John | September 14, 2015
|
I think a subsequent article on the canning subject would be to have a chart listing the temperatures and canning times for various foods. Also there should be a caution about altitudes (you touched briefly on in this article) and how low the boiling point of water is at high altitudes (l live at 8000′). Even fruits need a pressure canner up here. Thanks for the tip n reuseable lids, didn’t know that.
Mel Miller | September 14, 2015
|
This is an extremely important topic considering the probability that the power may go out for an extended period of time and all of the meat we have in our freezers will spoil if we don’t can or smoke it.
I would appreciate a lot more information and details such as:
What temperature do we need to bring the pressure canner to?
How do you keep the sides of the pressure canner from turning black from the fire, smoke, etc.? Put soap on the outside? Anything else? Aluminum foil?
Will our barbecue grill get hot enough and long enough to do it there?
How do you adjust for altitude differences?
Recipes? For Pork, Chicken, Beef…
Length of time to cook at constant temperature?
Tricks to keeping the fire at a constant temperature? Do you wate until the fire burns down to coals? Keep stocking coals? Do you put fire bricks along the sides to retain heat?
When you remove the P Cooker from the fire, how long do you wate for the pressure to escape? What about the fire, it will burn down and you’ll have to start all over again. Do you need 2 P Cookers? So you keep 1 going while the other is cooling?
“Need more input…more input…”
cArladet | October 9, 2015
|
You should buy the Ball Canning Guide. It has all of the information. There are others out there also. Oh, and there’s a site, http://www.simplycanning.com/
This is a go to for me. Loaded with step-by-step instructions.
You should remember one thing if you’re using a dial gauge. I live in North Florida. I have to can at 10 pounds of pressure in a weighted canner, but it’s eleven pounds in the gauged canner. Don’t ask me, but that’s what the books say. I make my own broth to can meats, and oh my goodness, it’s better than you can imagine! My friends and family were shocked at the tenderness and taste. NEVER change the amounts of listed ingredients when making soups, stews, etc.! You can adjust the seasoning, but nothing else. Acidic and non-acidic foods have very specific processing times. Hope this helps. I only started doing this a few years ago and I love it!
fanofjesus | September 14, 2015
|
thanks for the article.
I have successfully canned bear meat, which we get a lot of as my husband hunts. I tasted the finished product, and it is quite palatable-especially bear meat, which gets better the longer it’s cooked.
F. Hubbard | September 15, 2015
|
We canned over open fire all the time when I was a child. We used a washtub as the canner. Granted, it was an all day job but I am still kickin’ so I think we did something right! I also can over a camp stove burner to keep the heat out of the house.
Dean | September 15, 2015
|
Great article, i had to improvise this canning my peaches this year due to running out of propane. I made a make shift rocket stove out of a concrete flower planter, worked great and the yard was empty of sticks when i finished. But i sure wish i knew about the soap thing. I think i ruined the blue finish on my water canner.
hillbilly girl | September 15, 2015
|
There are a lot of good canning how to books available online & in stores.
If you want or need to do a lot of canning at one time, it is much easier if you have 2 canners. When one comes off the heat, put the second one on. This is especially helpful if you are canning a lot of meat at one time.
BONNIE | September 15, 2015
|
You can get good books online. But it cost a lot more….Go to your locale thrift shop and get them cheap, younger people seem to not think they would use grandmas old cook and canning books so the donate them, you can get at a great price. and can get more then one to compare what they say. Theres more then one way to do things and still be right.. (they maybe sorry they did that some day) and while there check to find jars, even if its only one or two add up….if lucky you might find a good canner pot. just keep checking back with them.. yard sales are also a great place to find things… I have a few cases of jars now. I got just a few jars each time.. take care and God Bless…
Pingback:The Easy Way To Canning Meat Off Grid | TheSurvivalPlaceBlog | September 15, 2015
|
Marius | September 15, 2015
|
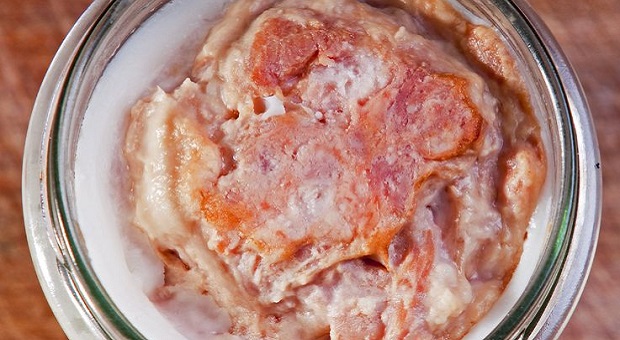
Blah,blah!… Want to know how my grandmother was preserving meat 40 years ago? She cocked the meat on a pan, over open fire, or even better, she roasted it on the grill ( smoke really helps preserving), then put it on jars and filled them with overheat lard. As long as lard after it cools completely covers the meat, the jar is not even necessary to be completely sealed!
I have in my pantry canned meat made by this procedure three years ago! In July this year I opened one jar to check if it’s still good to eat, and it was OK!…
Michael Smallwood | September 16, 2015
|
It truly scares me to consider canning meat. I much prefer meat that has been freshly butchered, or caught.
I have a propane stove that works even if the power goes down, but I also have a wood burning cook stove outside.
I am unsure of what kind of situation I might be facing that food will be a priority. I’m not counting on harvesting deer, or in fact any animal in an emergency. It might come down to not being able to raise pigs, chickens, or even rabbits. Then what???—canned meat and sprouts, and bread if you can pull it off.
I live pretty rurally but can only imagine what it would be like to defend your garden from starving people.
What a daunting world we have seen transpire.
Could you shoot starving people who are raiding your garden, or home to stay alive??
Lilia | September 16, 2015
|
It scared me as well, the first time I pressure canned some meat. I got over it. Past Thanksgivings have produced sales of turkey at 59 cents per pound and I would buy 5 big turkeys. I froze 4 and cooked up 1. I canned up that cheap meat and a few jars of the bone broth (soup broth). It is so great to grab a pint of already-chunked turkey meat in the heat of summer to make a nice, cool “chicken” salad. I had a freezer stop working and I was able to can up the meat so it wouldn’t spoil. Quite a money saver, so don’t wait to try doing it. Find a good sale on chicken breasts at your local store, then give it a try. I also pressure can my garden veggies. I freeze about 3 months worth, then can the rest because after about 3 months in the freezer they start to have a problem with ice crystals. You can also can things like spaghetti sauce with meat and such. Ask Mr. Google how long to can things if you don’t have a good book and always use the time/pressure according to the ingredient that needs the most time. Don’t put this off – do it and not just read about it.
Lois | August 7, 2016
|
This method of preservation has been around for hundreds of years. Check out colonial cook books. Now the term is confi lol it is a high priced item in gormet restaurants. Also you might check out the Backwoods Magazine, Jackie Clays articles, she is one very savie lady, she has a blog called Ask Jackie. She also has several books that are a valuable resource for homesteaders. She lives the life and has most of her life. She is my go to person. If you are near one of the Mother Earth Fair s or a Preparedness Fair, check out the Backwoods Magazine booth, it will be worth your time.
Mongo Afitza | September 16, 2015
|
The type of pressure canner is very important. You need a weighted or jiggler, not the type that only contains a pressure gauge. This will release extra pressure if your fire is too hot. Maintaining steady pressure is critical to 1) prevent a blowoff and 2) prevent jar failure and 3) obtain peak quality finisher product.
MelediE | November 2, 2015
|
There is nothing in any part of the article nor comments I could see regarding the POUNDS OF PRESSURE required to process a specifc item. Length of time is one thing, but the pressure pounds in a pressure canner is a critical component of this kind of canning!specify
Angela | September 17, 2015
|
I have tattler reusable lids, they really take practice. The first time I used them half of them didn’t seal. Start with jelly or fruit that you can reprocess quick and easy without too much worry. I also buy and can meat when it is on sale. You just have to be sure to follow the instructions for pressure and time. I like the Ball caning book, but you can also get a chart at the USDA website. Happy Canning All!
Pingback:How To Recognize And Treat Food Poisoning | Survival skills, survival guns, survival guide | September 20, 2015
|
Pingback:How To Recognize And Treat Food Poisoningdisasterdefense.us | disasterdefense.us | September 20, 2015
|
Pingback:5 Basic Skills You Need To Make Survival Food | Survival skills, survival guns, survival guide | September 22, 2015
|
Pingback:5 Basic Skills You Need To Make Survival Fooddisasterdefense.us | disasterdefense.us | September 22, 2015
|
Pingback:The “Must Have” List For The Survival Cooker’s Kitchendisasterdefense.us | disasterdefense.us | September 30, 2015
|
Pingback:Back To Basics: How To Make Maple Syrup At Home - Survival By Preparedness | October 4, 2015
|
Pingback:5 Basic Skills You Need To Make Survival Food | October 6, 2015
|
Pingback:7 Basic Survival Foods For Vegetarians - Survival By Preparedness | October 7, 2015
|
Pingback:3 Necessary Foods That Are Tough To Stockpile | Survival skills, survival guns, survival guide | October 28, 2015
|
Pingback:The Best Way To Stockpile Vegetables Off-Grid | Survival skills, survival guns, survival guide | November 11, 2015
|
Pingback:6 Top Foods That Slowly Kill Your Heart | Survival skills, survival guns, survival guide | December 3, 2015
|
Pingback:6 Top Foods That Slowly Kill Your Heartdisasterdefense.us | disasterdefense.us | December 3, 2015
|
Pingback:How To Recognize And Treat Food Poisoning - Backdoor Prepper | January 5, 2016
|
Pingback:How To Recognize And Treat Food Poisoning | Prepper's Survival Homestead | January 5, 2016
|
Pingback:Canned Chicken Broth Fail - Page 2 | February 20, 2016
|
Pingback:Canning Meat Off Grid-Getting Started - Survival Bell | February 25, 2016
|
mike | May 14, 2016
|
What about making charcoal and using that to heat as it would be a higher temp burn maybe overloozing something but seems like it would be better
Pingback:How To Rehydrate And Prepare Your Preserved Food - Prepper Dome | June 2, 2016
|
Pingback:How To Dry Can Food For Survival | Survivopedia | June 6, 2016
|
Pingback:How To Dry Can Food For Survival | Prepper's Survival Homestead | June 6, 2016
|
Pingback:How To Dry Can Food For Survival | | disasterdefense.us | June 7, 2016
|
Pingback:What You Need To Know About Pet Food For Survival | | disasterdefense.us | June 19, 2016
|
Pingback:50 Things To Stockpile On A Budget This Fall | Survivopedia | October 4, 2016
|
Pingback:How To Choose A Good Pressure Cooker | Survivopedia | March 5, 2017
|
Grampa | October 12, 2017
|
I will catch hell for this but I will post it anyway when the SHTF you will have people who will take what you have. well if you have spoiled food keep it on your shelf or hide it where they can find it like a normal family would when they take their prize they will find themselves hungry with spoiled food or if they are stupid they will eat it and with any luck will finish their raids. another use is for wild dogs leave it out whe they come around and it will make them sick. a dog can eat meat that is spoiled but if their system isnt used to it it could kill them they are as much danger than the humans cruel? well life will be cruel choices must be made to survive first
So say I,,,,,,,,Grampa
Pingback:9 Ways To Reduce Food Waste This Christmas | Survivopedia | December 18, 2017
|
Pingback:Q&A On Storing Meat Without Refrigeration In Hot Areas | Survivopedia | February 12, 2018
|
Pingback:How To Rehydrate And Prepare Your Preserved Food | Survivopedia | September 5, 2018
|
Pingback:6 Top Foods That Slowly Kill Your Heart | Survivopedia | November 22, 2018
|