When it comes to accidents, our pets are often worse than our kids. This is going to be especially true in the case of disaster because there may be extra debris and bacteria lying around to cause trouble for your 4-legged friend. If you’re a pet owner (or even if you’re not, but love animals), pet first aid will be a valuable skill to have. First, it may help to know some of the top injuries that you may be dealing with.
Ingestion of Foreign Substances
Whether the disaster is a storm or an act of war, there will no doubt be scattered debris and leaked substances such as anti-freeze that can do serious harm if your pet ingests them. The tough part is that many fluids smell good and are thus likely to be attractive to your pets.
To combat this, clean the area that your pet has access to immediately and keep it clean. Don’t let your pet drink from streams or puddles or dishes that contain rain water unless you know that they’re safe. If short, if you wouldn’t drink it, don’t let your pet slurp it down.
Cruciate Ligament Ruptures
The cruciate ligament is what gives stability to the knee and is typically what is pulled or ruptured when your pet is holding his leg up and refusing to walk on it. The worst part of this injury is that your pet probably won’t want to stay still long enough for it to heal. Encourage him to do so.
Heat Stroke or Dehydration
Your pet is just as susceptible to these conditions as you are. You need to make sure that he stays hydrated. If it’s too hot, find him shade or let him in the house with you. Don’t ever leave your pet in the car because on an 85 degree day, it only takes about 10 minutes for your car to heat up to a sweltering 102 degrees, even if you left the window cracked. Use common sense and if you wouldn’t leave your kid (or yourself) somewhere, don’t leave your dog there, either.
Video first seen on Pet World Insider
Cuts and Abrasions
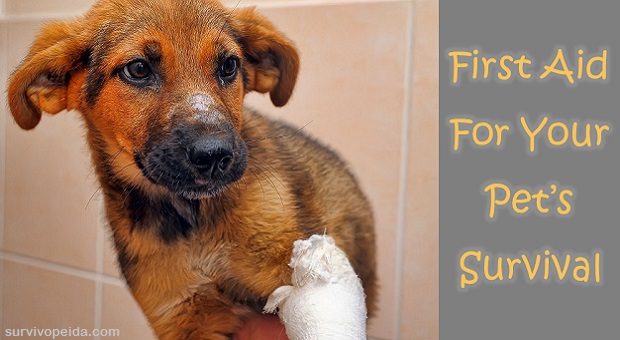
The danger from cuts and abrasions in a post-disaster situation may be 3-fold. First, you probably won’t have access to a vet to do any stitching that may be required so you’ll have to be prepared to do that. Second, you probably won’t have access to antibiotics for your pet so the risk of infection is higher.
Finally, stagnant water and polluted puddles are going to be breeding grounds for disease and open wounds are an ideal entry point that can lead to infection or severe illness.
Ideally, keep your pet close in order to reduce the odds of pet injury. If he does get a cut or abrasion, treat it promptly and wrap it to reduce the risk of contamination and infection. Most definitely keep him inside so that he can’t get into anything else.
Punctures
Yes, these are sort of in the same category as abrasions and cuts, but there is an added risk to a puncture wound that isn’t as prevalent with wounds that are open. That risk is abscess. This occurs when debris and infection sit in the wound because, unlike open wounds, a puncture may not be able to drain and it may seal over on the top layer of skin, leaving debris and bacteria stuck inside with no way to drain.
Clean punctures extremely well and make sure that they drain well while they’re healing.
Snake and Insect Bites
Every single state in the US has some sort of poisonous snake and all sorts of biting bugs. Whether your local threats involve rattlesnakes, copperheads, water moccasins or coral snakes, it’s best to keep your dog away from brush and bodies of water. A snake bite in a survival situation may very well be deadly.
Insect bites aren’t typically fatal but the infection and disease, such as West Nile Virus, that they carry can be a serious health threat both to your pets and to you. Mosquitoes, ticks, flies and fleas all carry diseases that you don’t even want to dwell on.
Lemon juice is a great natural bug repellant as is vinegar, though you may not want your pet smiling like that. Keep your pet inside at night when insects are the worst and do a body check on him every couple of days, at least. If you notice that he’s picked up fleas, be proactive and get rid of them.
Broken Limbs
These need to be treated in much the same way that you would treat them in a human, though you need to be sure to stabilize it better because keeping your pet immobile is going to be a challenge.
Video first seen on Dr Andrew Jones
How to do CPR on Your Pet
Depending on your pet, this may be extremely challenging because you need to find the heart and you need to be careful about how much air you blow in because you can fill the lungs, then the excess will go into the stomach, just like on people. Not good. CPR on pets is similar to CPR on people – remember the ABC’s: Airway, Breathing, Circulation.
The first step to CPR on a dog or cat is to check the airway. Be extremely careful because you can get bitten during this process, which can cause much bigger problems. Just as with people, you can cause further damage when you straighten the neck to clear the airway if there is spinal injury. However, if he’s not breathing, that is the priority at that point.
Straighten his neck, gently move his tongue so that it’s out of the way, and find out if he’s breathing. Don’t put yourself at risk. Practice “Look, Listen, Feel” – look to see if you can see his chest rising, listen for breathing, feel for breathing.
If he’s not breathing, then you need to do move to step 2 – rescue breathing. Close his mouth, cup your hands around his snout and blow a breath directly into his snout. Look, listen and feel for that breath to go in. If it does, do it again. If it doesn’t, rearrange his head to clear the airway and try again. Give one breath every 3 seconds. For a large dog, give a full breath. Adjust the amount of air according to size.
You need to follow through on the third step, Circulation, to see if the animal has a heartbeat. On a dog, place your hand on the left side of the upper chest and feel for a heartbeat. If none is present, you need to start compressions. Do this by laying the dog on his right side. Then locate the center of his chest, which is right about where his left elbow meets his ribcage. This is where you’re going to give compressions.
For small dogs, use your thumb and forefinger. For large dogs, use the palm-over-hand method that you use for people. Compressions should be 1.5 inches deep. Deliver 15 compressions and 2 breaths. Check for a return of pulse every couple of cycles. Stop when you get a heartbeat or breathing.
Now you know what the major injuries are for your pets and how to perform CPR on a dog. If you’d like, the Red Cross offers Pet CPR classes, so just check with your local branch. If you have anything to add, please do so in the comments section below.
This article has been written by Theresa Crouse for Survivopedia.




















Comments 5