Guns play a key role in maintaining personal safety before, during, and after a major social collapse.
When you are up against superior forces, you would be amazed at the kinds of simple weapons that will make it possible to evade capture, or even kill a determined enemy.
In fact, if you study the ninjas and samurai of Japan, plus martial arts, you will find that even the best trained and armed soldiers can be beaten with simple tactics.
While the clothespin gun is not in and of itself considered a lethal weapon, it can be used to shoot poison darts, flaming matches, and smoke bombs.
Since the clothespin gun carries no heat signature, operates in virtual silence, and has minuscule metal elements, it can be transported with ease, and also disguised in any laundry bag.
As an added bonus, once you know how to build these guns, you will always be able to make weapons with very few tools and materials.
Purpose
The clothespin gun is usually considered an office toy that can be used to shoot darts. Typically, it cannot pierce more than paper at short distances. The ammunition type and weight of the projectile have a huge impact on the gun’s effectiveness. You can just as easily use needles mounted on toothpicks or other pointy objects that can pierce skin and light weight clothing.
Materials
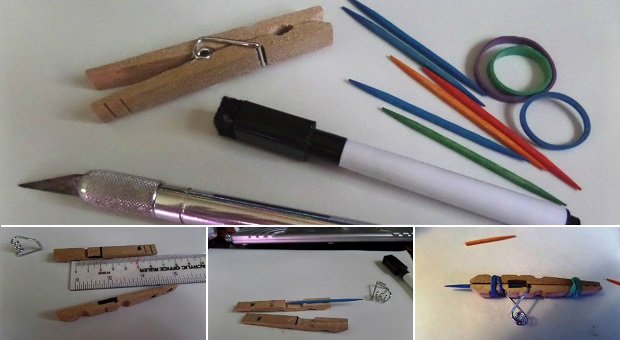
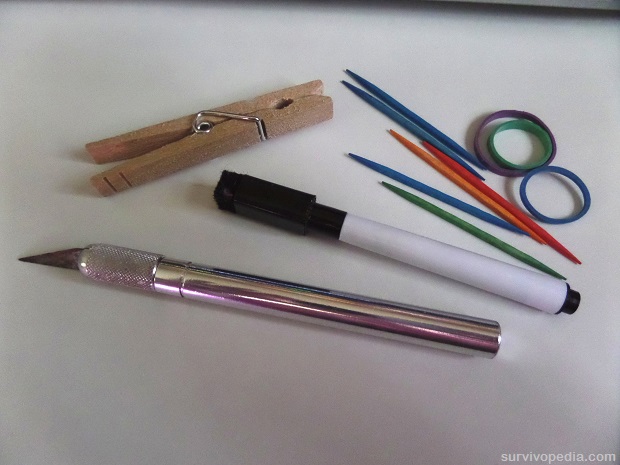
- 1 clothespin
- 2 rubber bands
- Toothpicks, needles, matchsticks or similar for ammunition
Optional: Super glue
Tools
- Ruler
- Magic Marker
- Xacto knife
- Pliers
- Sandpaper
- File
Optional: Dremel or similar rotary tool
How to Build
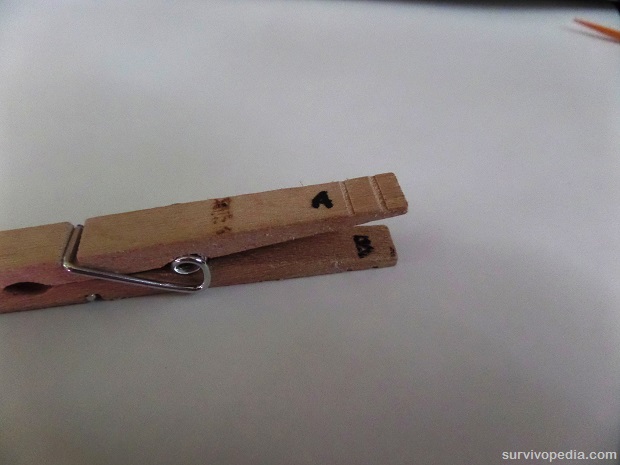
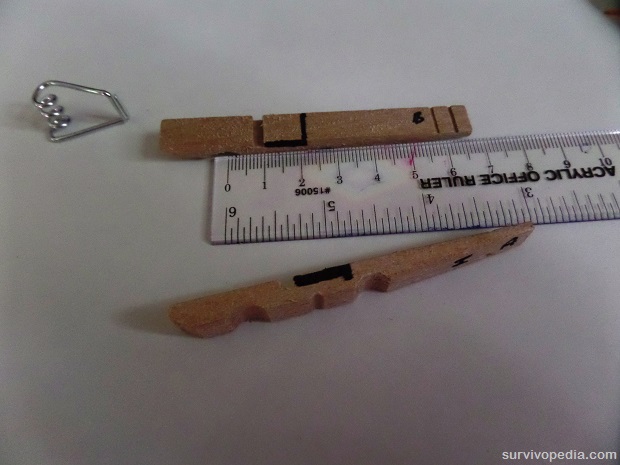
1. Label each of the back wings of the clothespin. Make sure that the letters are visible on the top and bottom. It is also important to designate the inner facing sections of the clothespin. Since both sides require a slightly different cutting template, this will help prevent confusion.
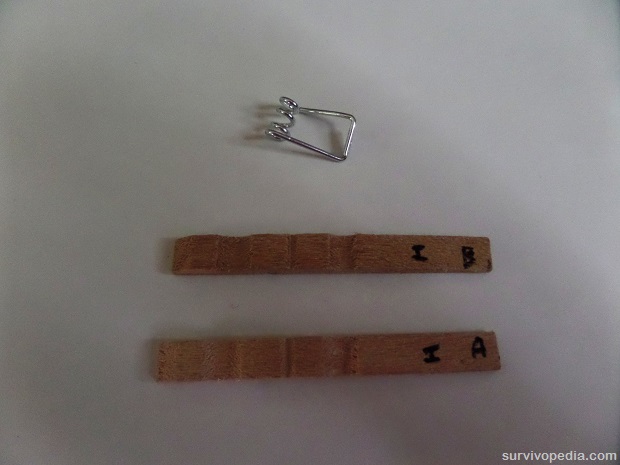
2. Remove spring from clothespin. Be careful not to break the clothespin. Also, try not to bend the spring out of shape as that will weaken the spring and prevent it from being as useful as possible later on.
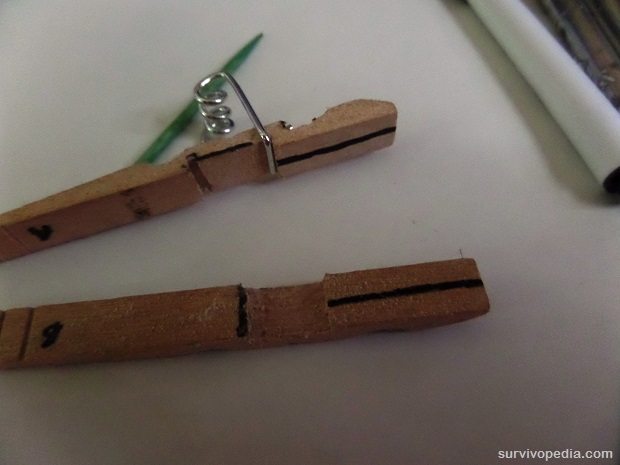
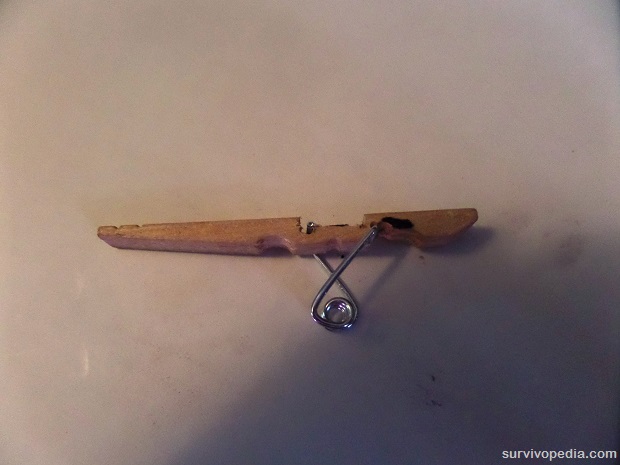
3. Use marker to draw a line 3/4 to 1 cm back from the original spring slot on side B. Repeat on Wing A. Next, on the narrow side, draw a line to cover the depth of the original spring line back to the new line drawn. This area will be carved out or chiseled out to make room for the spring to advance, and also for an ammo chamber.
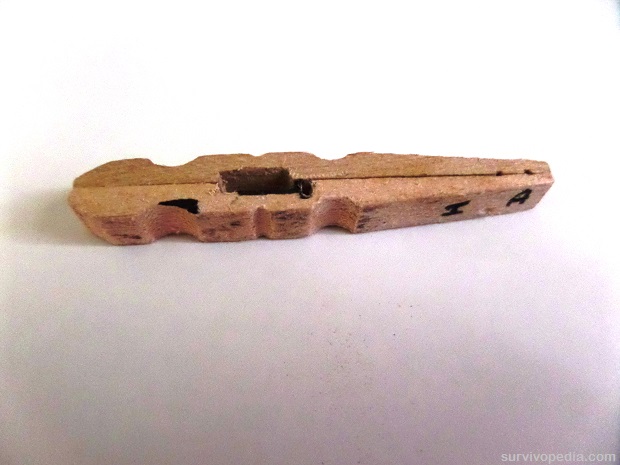
4. Turn Wing A to side view. Mark slightly downward from the side line in order to create spring holder. When cutting, do not go too deep or the wood will break when you try to use the clothespin gun. Failure to cut deep enough will cause the spring to release at the wrong time.
After removing wood for the ammo and spring clearance from wings A and B, return to Wing A and draw a squared notch on the front most curve. This is where the second part of the spring will attach. Be careful not to cut too deep.
Making this line further away from the spring clearance area will result in having to pull the spring wider. Cutting this notch too close to the spring clearance area will significantly weaken the entire wing.
Common Problem Point: The depth of the ammo/spring advance area needs to be managed carefully. The removed area should be as squared off possible. If this area is too deep, the spring can easily go right under or over the ammo. If the area is not deep enough, the spring will not have enough room to advance fully.
When creating this part of the clothespin gun, it is also very important to refrain from making the space too long. If you have to pull the spring back too far, there is a chance of warping it. By the same token, keeping the spring closed too much will produce very little power. I found, through trial and error that 1 cm was too large a distance, but got much better results with 3/4 cm.
5. Create the barrel template. Even though some clothespin gun designers do not create a barrel grove, I found it absolutely essential for toothpicks and other larger sized projectiles.
If you do not have a barrel groove, the spring may not be strong enough to push the projectile out. Less friction in this case equates to the projectile being pushed further and faster.
When creating the barrel groove, make sure to extend it all the way into the spring clearance chamber. Failure to do so will cause the spring to hit the end of the chamber without ever reaching the projectile.
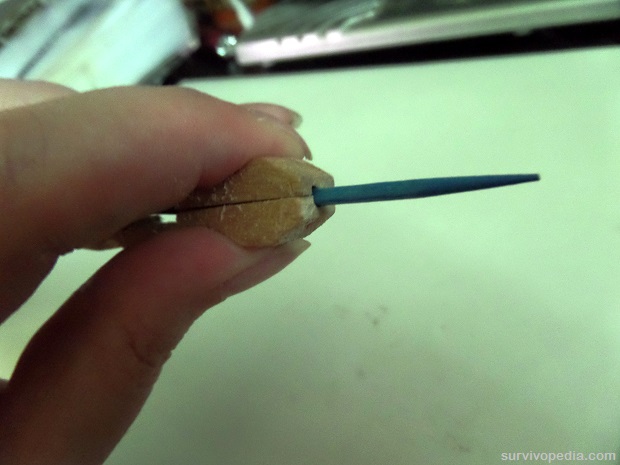
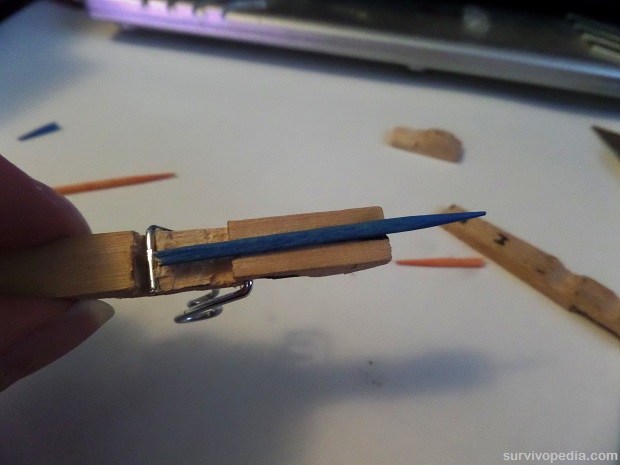
6. Fit ammo to the barrel. The ammo should fit snug, but still move easily in the barrel. Make sure that the ammo sits evenly on the bottom of the spring clearance area.
This part can be tricky if you do make the barrel diameter too large, which will enable the spring to slip under the ammo instead of pushing it out.
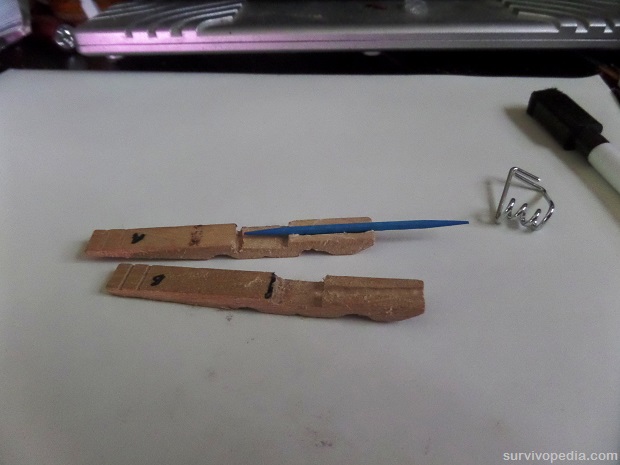
7. Set the spring. Place the previously “outer” edges of the clothespin so they now form the inner portion of the clothespin gun. Align one end of the spring to sit in the groove behind the spring clearance chamber, and then the other side in the second groove outside the chamber. The entire spring should be mounted on Wing A.
At this stage, if the spring is too loose or has to be pulled apart too much, adjust the size of the spring clearance chamber for a better fit. This includes making sure the spring does not easily jump out of either groove on its own.
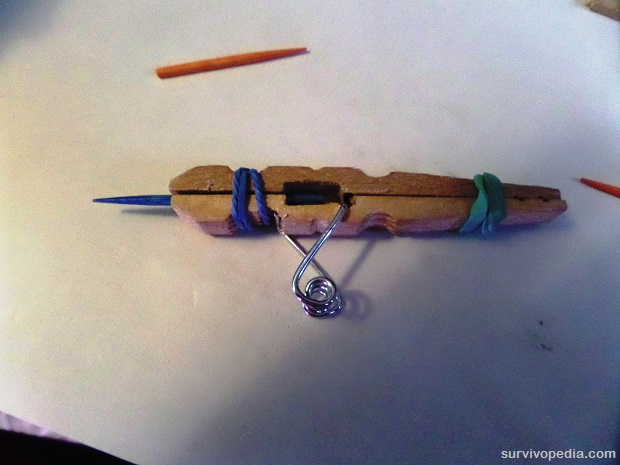
8. Load projectile. Place toothpick or other projectile into the barrel. Next, place rubber bands to the front and rear of the clothespin gun to hold both halves together. You may also choose to load the ammo after binding the pieces together. Since this will be a permanent structure, you may also want to use crazy glue to keep the pieces together.
9. The completed clothespin gun loaded with toothpick ammo.
Operation Instructions
Simply hold onto the back of the clothespin gun push up/squeeze on the spring.
To reload, simply slide the spring end back into its groove and put another projectile in the barrel.
Advantages
The greatest advantage to keeping a clothespin gun on hand is that it is very easy to disguise and can easily be overlooked by anyone seeking to disarm you.
For added disguise, simply dismantle the clothespin gun and return the wings back to their previous orientation. In this position, you can easily keep it stored away and disguised in a laundry bag, or even in your purse /backpack along with some toothpicks or sewing needles.
Since the clothespin gun is also very lightweight and cheap to make, it also makes a good addition to any emergency bug out bag.
Disadvantages
While the clothespin gun can help you get out of an emergency situation, it does have a very limited range and load capacity.
At most, you can push a needle or toothpick 10 – 20 feet. With practice, that may be just enough to hit a target’s eye or other sensitive area.
It should also be noted that the ammo you choose will also determine the success of your efforts. For example, modifying the clothespin gun to accommodate (and then light) a strike anywhere match will be of immense use if you need to create a diversionary fire.
In a similar way, if you are going to try and deter someone from following through on harmful intent, it will be of immense benefit to develop poison darts that can penetrate at least medium weight fabric.
Ideas for Further Development
The clothespin gun was originally designed from a conventional sized clothespin. If you visit Wal-mart or a craft store, you may want to try larger sized clothespins.
For example, Wal-Mart has a foot long clothespin with a fairly strong pin. Be sure to practice on smaller models so that you have some good ideas about depths and distances required to create a strong, stable gun. A larger sized clothespin gun with a stronger spring would be ideal for launching mini-smoke grenades as well as darts with specially designed arrow tips.
Finally, if you have access to a 3D printer, experimenting with polymers and different shapes may enable you to create a smaller bodied “clothespin” gun while using a larger spring.
As our economy continues to totter, leaders feel emboldened to erode our right to bear arms and live safely and securely.
While many people say they will never give up their guns, there will come a time when bullets and materials to reload them will become impossible to obtain. To add insult to injury, constant pressure from confiscating and looting will also take their toll on those who did everything possible to have plenty of conventional guns and ammo on hand.
Taking the time now to think about simple, easily disguised weapons such as a clothespin gun will be of immense benefit. Never forget that the Japanese government believed their military was invincible even though turmoils within the country led to defeat in eras prior to WWII. The “household” samurai and ninjas not only defeated better trained, elite, wealthy men, they went on to form a legacy of self-defense and survival that we can still use to this day.
This article has been written by Carmela Tyrell for Survivopedia.





grintch | June 17, 2015
|
What ever happened to “Zip Guns”?
Pingback:5 Ways An EMP Could Kill Your Car - Survival By Preparedness | October 1, 2015
|
Bill | October 27, 2015
|
I strongly advise you (or anyone) not to use your improvised “gun” against an intruder.
Instead of just taking your “stuff” and leaving, it might make them mad enough to beat the “stuffing” out of you before they leave. Never make an unprovoked attack on an intruder without the strong probability that you will incapacate him or her long enough for you to make your escape. If you are in fear of your life(or to protect another) and are not seriously martial arts trained, use a hammer!