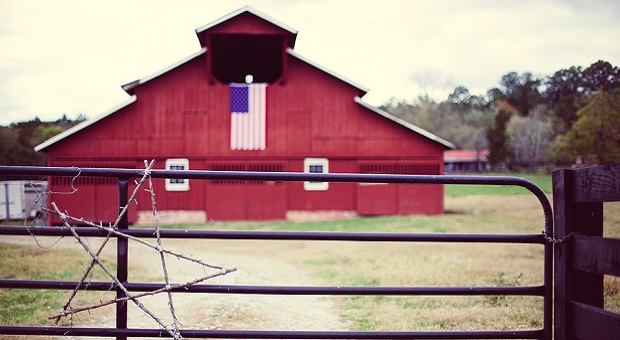
Bright red barns setting in the middle of a pasture are beautiful, but paint does more than just make a house or building look good. Paint also protects your wood from the weather. If you want to live sustainably, it’s easy to make your own outdoor paint that will look great and last for years!
Now in the old days, it was common to paint wood with motor oil or tar to waterproof it. Both methods were effective but extremely hazardous and definitely not environmentally friendly.
There are other homemade outdoor paints, including whitewash and milk paint, that have been used for centuries that are both effective and safe.
You probably haven’t given much thought to what exactly goes into making paint because it’s much easier to grab a can or a bucket of it from your local superstore or home supply store. It’s OK. We looked for you, and you probably have just about everything that you need to make your own indoor or outdoor paint already in your cabinets.
To make paint, you need three primary components: a binder, a thinner (solvent), and a pigment. The last is, of course, optional but it’s not that hard to make your own pigments out of berries, roots, or clay. Clay is often used as the binder too, so you can kill two birds with one stone. If you don’t think you live in an area with clay, think again! You can extract clay from just about any soil using just water.
A fourth component, a filler, is often used to add texture and bulk. Common natural fillers are hydrated lime powder (pickling lime), clay (great to use with flour) and powdered chalk (called whiting).
Binders are what makes the paint stick to the surface. Common binders are clay, flour, milk, linseed oil, and even beeswax (it’s a great waterproofer). Common thinners are water, citrus thinner, turpentine, and mineral spirits (the last two serve as drying catalysts as well). Pigments, of course, can come from anything from clays and minerals to flowers and berries. If you’re using clay as a binder or filler, you may want to keep that color in place of adding pigment.
How to Make Whitewash
Up through the ‘50’s or so, most picket fences and even white buildings and houses were often painted with whitewash. This is a simple paint to make and can last for several years. The catch is that you need to add several layers because it’s extremely thin. It’s made with hydrated lime powder and water, which is why it’s chalky.
You can also add fillers such as salt, flour, clay, or milk to make it thicker or more durable. Whitewash as is, with just lime and water, has almost zero sticking power until it cures, which can take a few days. It’s really only good for porous surfaces.
You may have noticed that old whitewashed surfaces chip off but still have color underneath – that’s because there are so many layers, and they’re doing exactly as intended! Making whitewash isn’t an exact science. Add enough water to the lime to make it fairly watery – thus the name. Add fillers to give it more substance if you want.
Paint on in layers, adding a new layer as the previous one dries.
How to Make Flour Paint
This is a paint that’s easy to make and will last for as long as 5-10 years, even outside. Though most of the time, it seems like flour recipes are designed for indoor use, this one incorporates linseed oil. That makes it good for outdoor use.
Video first seen on TheGridTO.
How to Make Milk Paint
The recipe for this paint sounds almost like a cheese recipe! Milk works for paint because the protein in it, casein, gives it sticking power. As you may suspect, it will have a milk smell until it dries and cures.
As with whitewash, milk paint is fairly translucent so you’ll need to add several coats. You can also add fillers to give it more substance.
To make one gallon of milk paint:
- Juice from 4 lemons or 2 cups vinegar
- 1 gallon skim milk (this part is important – it MUST be skim!)
- Pigment of your choice, if you’d like
- Cheesecloth or towel
Mix the lemon juice or vinegar with the water in a bucket and let it sit to curdle at room temperature overnight. Strain it using the cheesecloth or towel. Add the pigment. If you’re using a powdered pigment, add a bit of the milk mixture at a time to make a paste, thinning it until you can mix it into the batch without lumps.
Milk paint is going to be super thin, so if you’d like to add fillers or other binders, then you can and still have paint that’s the consistency of, well, paint.
As you can imagine, milk paint will spoil quickly so you need to use it immediately. It’s great to use on porous surfaces, so just brush it on. .
How to Make Oil Paint
Oil paint seems to take forever to dry but is probably the best paint to use on outdoor surfaces. Some may never harden completely. Instead, it remains a bit plastic, which is a good thing because it allows for natural expansion and shrinkage of the underlying wood. Oil paint also adds waterproofing, and it lasts longer than other paints that we’ve discussed.
It’s best if the wood you’re painting is sanded down so that the paint can cover it well. Priming it is preferable, but if you’re doing large surfaces such as a barn, you probably won’t want to take the time to paint it twice, or maybe you will.
The one problem that I’ve found with making outdoor oil paints is that you will need A LOT of oil for large projects, which may be in short supply if SHTF. It would be great for small projects that you only need a gallon or so to complete, though. At any rate, here are a few recipes.
Oil Primer
Primer helps to seal the wood and prepare it to hold the paint better. You can apply 2 coats, 48 hours apart, if you’d like. It’s simple to make a primer. Just combine equal parts of linseed oil and solvent. Paint it on with the grain, wipe off excess, and let it dry for 48 hours.
Oil Paint
There isn’t an exact recipe for oil paint because it depends on what fillers and pigments you use. Those components make a difference because they absorb the oil differently. Combine the fillers (clay or flower are probably best), pigment, and oil until you get a paste that’s the color that you want. Add more oil until it turns into a thick liquid that flows, then thin with solvent until it’s the consistency that you want.
It will keep for quite a while in a sealed 5-gallon bucket but it is, of course, best if you use it immediately. Just paint it on with a brush – you probably won’t need more than one coat.
Oil Glaze
Oil glaze is great to add waterproofing to flour and milk paints. They’re also great to use as stains. You can add pigment, or just use it to protect and waterproof the natural color of the surface that you’re glazing.
To make a quart of glaze, dissolve 3 tablespoons of filler into 1 cup of linseed oil by adding oil to the filler a bit at a time to avoid lumps. If you want to add pigment, do that now, to the color that you want. Once you get it combined, add another cup of oil, then add 1 1/3 cup solvent. Stir until there are no lumps and strain through cloth if necessary. It’s ready to use immediately. Remember that since it’s an oil, it will take a couple of days to dry completely.
These are just a few tried-and-true ways to make outdoor paint at home. Some are more durable than others, but each has its advantages and disadvantages. One advantage that they all have, though, is that you can make them yourself from ingredients that are readily available to you.
If you’ve made any of these paints or have suggestions for others, please share with us in the comments section below. And click on the banner below to find out more secrets of our ancestor survival!
This article has been written by Theresa Crouse for Survivopedia.






Joey McGuire | August 12, 2016
|
Hi Theresa,
This post couldn’t be more timely for me. My wife and I just moved into an awesome house, but the privacy fence is old and the 2 X 4’s and many of the planks have severely warped. Before replacing them I was wanting to find a way to waterproof the new wood using natural materials. Thanks so much!
Joey
Gaby | August 12, 2016
|
That flour paint video is for tempura–it does NOT contain any linseed oil!
Linda | July 19, 2022
|
There is no recipe for the flour paint. If it is what is made in the video that isn’t clear. It looks like the video is just for making paint that you can draw with not use outside. If it is for both it is not clear. It would be helpful if the recipe was also written under the label How to make flour paint.
Melissa | July 8, 2023
|
In the segment: How to Make Milk Paint – The directions here stated say to “Mix the lemon juice or vinegar with the water in a bucket and let it sit to curdle at room temperature overnight.” Should say: “Mix the lemon juice or vinegar with the MILK in a bucket and let it sit to curdle at room temperature overnight.”
Thank you so much for this article, it adds much information to what I’ve researched so far. I’ve found information for applying to brick or plaster/drywall that instructs to make a thicker plaster-like mixture of lime for the first coat and subsequent coats will be made of thinner and thinner lime mixtures. I’m looking for how to apply to wood exterior of a house and I want to know if you would use the thick first coat layer in that instance. It seems like it would save time from applying many layers of thin. I don’t want to go over the whole house too much! Once only if I could find out how to do that. This article has given me more to consider.