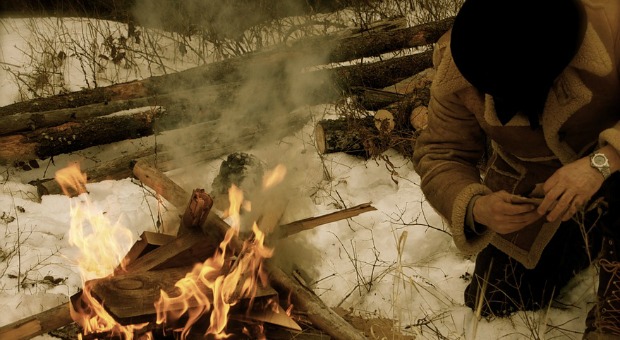
With winter here and global warming a thing of the past (now it’s climate change or something), knowing how to start a fire in the snow may save your life someday. I don’t know about you, dear reader, but in my neck of the woods it’s been snowing for days.
If you’re asking yourself why you should learn how to start a fire in the snow, well, the simple answer is: you never know, so be prepared for any situation.
Winter time is arguably the hardest in terms of outdoor survival and if you can’t build a fire, you’re dead meat regardless of the gear you have at your disposal.
And if you’re out there, stranded in the snow in the middle of nowhere and waiting impatiently for help from above, knowing how to make a fire will make the difference between life and certain death.
As night falls, the temperature will plummet, making you feel like you’re in an icebox. If you can’t make a fire, you’ll find yourself in a life-threatening situation if there ever was one. In addition to keeping you from freezing to death, fire keeps wild animals away and it allows you to cook (or defrost) your food, and even make water by melting snow or ice.
Fire is your best friend when it comes to wilderness survival, as it takes care of all that’s important for a prepper: food, water, and shelter (warmth).
For most modern folk, especially youngsters who live their lives pecking at their smartphones, starting a fire in any type of outdoor scenario is a rare occurrence, let alone making fire in extreme weather conditions (snow, wind).
On the other hand, if you never leave your house or the city, you may think bad things will never come to you. That works for hobbits, yes indeed, but then again, there are plenty of scenarios when your bubble can burst in a matter of hours.
For example, what will you do as you get trapped in the snow during your vacation in the Rocky Mountains or wherever, with a blizzard coming out of nowhere, blocking the roads and/or your car somewhere in the middle of…well, you see where this is going, right?
How to Start a Fire in the Snow
Getting back to our “story”, starting a fire in the snow is the second hardest thing after trying to do it during a rainstorm.
Starting a fire in the snow will present you with two basic problems.
First things first – snow will definitely melt at some point and the water may quench your hard work, together with the flames.
Another thing to contemplate about fires, snow, and winter is that cold comes into play, i.e. you’ll have to raise the temperature of your combustible materials farther than in the summertime in order to ignite them. That means that making a fire during the winter is more difficult than in the summertime, as it starts slower than “normal”, provided you know what normal is.
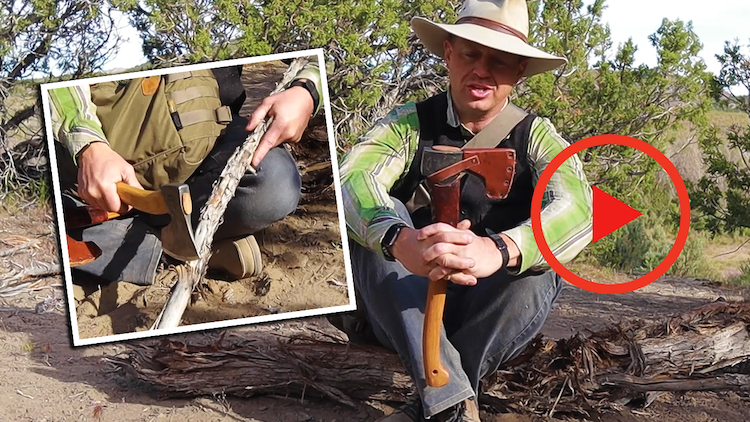
Video first seen on The Outside Files.
Choose the Right Spot
Everything in life is location, and the same principle applies to starting a fire in the snow, obviously. Selecting a proper site is the first thing to consider and is exceptionally important for your success (survival). The location should ideally be protected from wind, water, and snow.
Folks traveling outdoors during the winter prefer to make a fire under a tree most of the time, but be aware of trees carrying a lot of snow on their branches, as the snow may fall into your fire as it melts and put it out. And then you’ll be in a world of pain.
If you’re going to start your fire under a tree, make sure you knock the snow off the branches first. That eliminates the aforementioned risk and also, it will make sure you don’t have to clear your spot twice.
Start with a Clean Spot
This brings us to the next step: clearing the snow from your desired fire location. You can’t actually make a fire directly on snow, maybe on ice though, provided you can build a platform from rocks/logs.
You can clear the snow by brushing it away or you may walk on it in order to tamp it down. If you’re going for the tamping, you must realize that the snow will melt at some point, so make sure the water resulting from melted snow can drain away from your fire.
Also remember to clear the snow off the ground on a place near the fire for storing your extra wood, and, if possible, try to use rocks for raising your wood storage spot above the ground. If you don’t have enough rocks, you can use sticks laid cross-ways or make a platform using branches (the same can be used for the fireplace itself in case you can’t find rocks).
Both ways are good for keeping the wood from coming in contact with the ground, thus offering it the chance to get as dry as possible before using it.
When it comes to starting a fire in the snow, or in rainy weather for that matter, it would be ideal to use a large, flat stone as the fire-floor.
Video first seen on ExploringWithGeorge.
Prepare Your Tools
Raising the combustible materials just 1’’ or 2’’ above the ground will make all the difference in the world by offering the water the required drainage channels to run off through.
Another thing to consider and that is hugely important is the heat reflector because, after all, starting a fire in the snow is all about keeping you warm, and a good heat-reflector is aimed at accomplishing exactly that.
A cliff face makes for a good heat reflector, also a big tree or a large rock. You can always improvise one from a blanket, the silver survival types, using the silver side which will provide you with the best reflection.
Starting the Fire
Now, with the “preamble” taken care of, let’s talk a little bit about the actual fire-starting procedure. Lesson learned the hard way: along with a first aid kit, always carry something that can be used as a fire starter. A packet of waterproof matches and a couple of BIC butane lighters are a must-have item in any survival kit.
Ideally, you should also carry a dedicated fire-starter kit, which consists of a block of paraffin and sawdust mix, available just about anywhere. You can DIY a good fire starter using cotton balls soaked with Vaseline (petroleum jelly), carried inside a film canister.
The idea is to use a fire starter that doesn’t die out fast whilst providing a lot of heat at the same time.
If you don’t have a dedicated fire starter, you can always use small pieces of dry wood, which may be a problem, but these fellas are usually easy to spot near the trunk of trees. Avoid wood that was in contact with the snow, as it definitely has a high moisture content.
If you can’t find small dry pieces of wood, get your knife, find the driest dead branch possible, and whittle down until you hit dry wood. If you don’t even have a knife, I don’t know what you’re doing outdoors, really. You’ll have to get creative.
Tips to Remember
- Always collect enough fuel to keep the fire burning for a long time. You don’t want to stop in the middle of the “show” to get more wood, as the fire may die out while you’re hunting for combustibles and you’ll have to start again from the beginning.
- Always remember to gather large pieces of wood if possible, along with tinder kindling and smaller pieces for the initial fire.
- The big chunks of wood are excellent for keeping the fire burning overnight, thus keeping you warm and allowing you to go to sleep without worrying about your fire dying and all that.
- To get the most out of your fire, you’ll have to make sure that the fire and your shelter (if any) are as close together as possible.
- Try to build your fire right at the shelter’s entrance and to use rescue blankets on the roof and at the back of the shelter for keeping the heat inside, thus keeping you warmer.
- Don’t set it close enough that it’s going to catch your tent or shelter on fire, though.
- Always travel with several rescue blankets in your survival kit; they’re hugely important and you’ll always want one of them between you and the ground, right?
You can also heat rocks into the fire and use them for warming your bed before going to sleep, or wrap a heated rock using a sweater or something like that and use it as a heater (yes, sleeping with a rock, a true love story). If it gets cold enough, you’ll see what I mean.
One thing to remember: coals generate the most heat in a fire, so make sure you keep adding enough wood to your fire so it can burn and turn to charcoal.
If you have any ideas or comments, feel free to comment in the dedicated section below. Stay safe, stay warm.
If you want more tips, click the banner below and discover the survival secrets that helped our ancestors survive harsh winters!
This article has been written by Chris Black for Survivopedia.




Greg (So. Carolina) | December 27, 2016
|
Hey Chris,
What about a half dozen or so of charcoal briquettes in a zip lock bag as part of a prepper’s fire starter kit?
CCTer | December 27, 2016
|
Good sound info. I cant over emphasize the fact to collect enough wood. Most people underestimate the amount of wood needed. I would like to add the adding a “reflector wall” behind the fire (the opposite side of the fire from your shelter) with rocks if possible will help .
Tedd | December 27, 2016
|
I was a scout years ago(50-60) which was a time when the boy scouts actually taught you real survival skills (from the scoutmasters learned in the military. Most of them at that time were in the 2ns world war. Anyway, a great firestarting kindling is the dry underside of any pine/evergreen as they are 1st dry and 2nd full of pine oils which almost makes them like gasoline. Just make sure you build your base fire structure with the needles and small branches at the bottom and then mixed thru the structure.
Tedd | December 27, 2016
|
P.S. I forgot, the tall grasses in a field or forest are dead and dry in the winter. they also make a great firestarter.
Robert | December 27, 2016
|
One of the important things you forgot is starting a fire in windy weather/conditions in the wild.
You build your fire using logs as a shield.
First, collect a lot of logs about a two foot length.
Build a three sided hut around your fire location with a roof of logs about two to three feet high from the base of the fire.
You now build your fire inside your hut. This shields your matches or whatever way you plan to light your fire without the pesky winds to put it out.
Once your fire is going the winds will have a difficult time extinguishing it, not only that but your hut will become fire wood as time goes by building a hugh fire to keep you warm during the night.
This is something you learn in seal survival training classes prior to going through survival training skill test.
Doug | December 27, 2016
|
Another fire starter that works pretty well is dryer lint with a bit of vaseline or candle wax…. You can stuff a bit of lint into the paper tube from a used up toilet paper roll, and add a dab of vaseline, or drip some wax from a candle into the tube. If you are using flint and steel, try pulling a few fibers loose and creating a small bowl in one end of the tube to catch the spark. A couple of these in a ziplock is a very cheap and handy thing to keep in your glovebox!
Diane | December 27, 2016
|
I thought it was very informative!
Grintch | December 27, 2016
|
If you don’t even have a knife, I don’t know what you’re doing outdoors, really. You’ll have to get creative.
You could find a rough surfaced rock and rub the twigs on it to create “sawdust”
Oldshooter | December 27, 2016
|
If you plan to use the “hot rock in a sock” trick (which actually works), make sure you are using a wool or cotton sock. Nylon and other synthetics MELT!
popzi | December 28, 2016
|
Very informative…waiting to see more like this one!
Marilee | December 28, 2016
|
Make sure you look up above where the fire will be so there aren’t widow makers or boughs full of snow that can fall into the fire and put it out.
allan rhodes | December 31, 2016
|
Dried silver birch bark makes makes excellant starter for a fire. Or why not carry some firelighters with you which can be bought in any hardware shop or supermarket and they are not heavy to carry either.
Pingback:How To DIY A Paracord Survival Grenade | Survivopedia | January 17, 2017
|
Pingback:3 Steps To Start A Fire When Everything Is Wet | Survivopedia | December 18, 2017
|