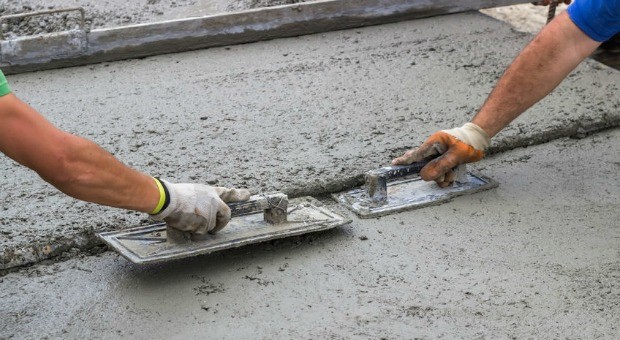
Concrete is a homesteader’s best friend, at least in this writer’s opinion (and that of Marcus Aurelius). Why, you may ask? Well, since the Romans, concrete can be described as the yardstick of modern civilization.
Basically, we live in a world made of concrete, while “urban homesteaders” hunt and forage in the concrete jungle. You see what I’m talking about? Concrete is the most widely used building material and it’s the ideal choice for building lots of stuff, ranging from roofing to furniture and everything in between.
Hence, today’s article is aimed at giving you a few DIY ideas about making and pouring concrete and to offer some suggestions for its uses around the homestead.
If you’re ready, let’s get to it!
First Things First: Learn How to Pour Concrete Yourself
First, let’s begin with the basics: the do’s and don’ts of how to DIY concrete.
The general idea is that knowing how to pour concrete yourself will definitely save you a few dollars if we’re talking about small scale projects or a bucket full when it comes to bigger things, like a garage floor or a swimming pool.
The good news is that pouring concrete is easy and relatively straight forward, as you’ll only require basic tools every homesteader already has in the garage or tool shed or whatever.
If you want to achieve better results, you should first determine which type of concrete to use, depending upon your project’s specifics. There’s a wide variety of concrete available on the market and ready-mix concrete is the most popular choice, because it’s very easy to use, i.e. all it requires is water.
However, if you want to get involved in a large-scale project, ready-mix concrete is more expensive than other varieties. If you’re the lazy type, there’s always the revolving barrel truck which will supply you with transit mix concrete at your doorstep, but if you want to save the most money and have tons of fun in the process (and also lose weight), buy the dry ingredients by yourself and mix ’em up.
Even if it will take some elbow grease (pouring concrete in large amounts is arduous labor folks!), it will be worth the stretch provided you own the proper mixing tools and the will to achieve!
When it comes to mixing your own concrete, keep in mind that there are 4 basic elements coming into play: the first is the Portland cement itself, then a fine aggregate like sand, a coarse aggregate like gravel/crushed rock, and finally, water. Gravel and sand are the main ingredients in finished concrete, but be extra careful and make sure there are no debris, such as dirt or leaves.
The best water to be used when pouring concrete is alkalide/acid/sulfate/oil-free water, which makes for filtered water by any definition. The quality of the end result of pouring concrete will only depend on how well you mix the four main components, so keep in mind that stirring thoroughly is key, regardless of the quantity.
If you’re working with wet sand, you must add 6 ¼ gallons of water for each bag of cement (standard bags have 110 pounds) if you’ll be building heavy duty stuff, such as walls, concrete-foundation or retaining walls.
Depending on the dampness of the sand, you must adjust the amount of water (more about that in the video tutorial) and always read the manufacturer’s instructions carefully for mixing concrete. Remember – Murphy’s Law.
Keep in mind that concrete is best poured when the weather is not very hot (the temps are between 40 and 80 F) and there’s no direct sunlight, as it may cause your concrete to cure too rapidly, causing cracks. Air that is colder will prevent the concrete from drying/setting properly or at all, so you should choose a period with moderate temps for a few days in a row.
Do the job during that time frame. Need I remind you, folks, that there’s a thing called The Weather Channel just for that, not to mention countless smartphone apps like AccuWeather.
Now, here’s the fun part, i.e. the YouTube video tutorial(s), actually there are 6 vids for you to watch carefully and then you can start pouring!
Video first seen on DoItYourSelfBuilder Brian Monroe.
If you’ve watched and learned your concrete-pouring/manufacturing techniques properly, let’s talk next about a couple of fun projects for your homestead using your own DIY concrete, alright?
Project 1: How To Make A Micro-concrete Roof Tile
First, let’s see how to make a micro-concrete roof tile. Roof tiles are pretty expensive to buy from the hardware store and if you have a giant house (implicitly a big roof in terms of real estate), you’ll save beaucoup bucks if you can manufacture your own tiles, won’t it?
The video is pretty straight forward: you’ll require a vibrating table, a plastic sheet to put over it, and the respective cement mixture. The rest is in the video. This is an easy, straight-forward job; the secret is to make the right mixture for roof tiles (or buy it directly from Home Depot or Amazon or whatever).
Video first seen on TAO Pilipinas.
Project 2: How To Build Custom-made Concrete Countertops
Here’s an interesting tutorial about how to build custom-made concrete countertops. The project is a much more complicated concrete-pouring job that will require lots of gear and materials, including things like glass fibers, glue guns, melamine-faced particleboard, plywood, furring strips, steel wool, various adhesives, and professional tools.
In the end though, it will at least be worth watching and afterwards imagining yourself doing it in a Sunday afternoon (just kidding, of course – anybody can do it with the right materials and equipment).
Video first seen on This Old House.
Project 3: How To Pour Concrete Floors
Now, for a bigger, burlier job, let’s take a look at this YouTube video in which the people are pouring a variety of floors using techniques and tools such as floating the concrete, steel trawlers, bull floats, power trowels etc.
Basically, this is how professional contractors (masons) are doing it (as in pouring floors, this is a family show), so you can learn a few tips and tricks from “the Man” himself.
Video first seen on Mike Haduck.
Project 4: How To Build Concrete Furniture
Even furniture can be manufactured from concrete. I bet you never thought about that, did you? Here’s a cool idea about how to build a concrete table, an idea that came from Holland (thanks Leon) and which can be expanded further using your imagination (like, building two tables).
Video first seen on Leon Raymakers.
Project 5: How To Build Concrete Garden Pots
Last but not least, you can always build your own garden pots by pouring your home-made concrete and putting some not-so-intensive physical labor into the mix (pun intended). The process is very intuitive and fun to do: you’ll have to mix the concrete and then pour it into molds, thus making your own custom garden pots.
Just check out the video. It’s as easy as it sounds.
Video first seen on TheGardenerMag.
I hope the article helped. If you have other ideas or comments, just use the dedicated section below. Good luck, have fun folks!
This article has been written by Chris Black for Survivopedia.


Bill in Idaho | September 1, 2016
|
I Agree Totally – Concrete is Very Versatile – and Permanent — IF . . . You wash the Sand and Aggregate (gravel) thoroughly – FIRST ! I wash my sand 4 times, and my aggregate 3 times. You have All seen sidewalks and driveways where the surface is “sluffing off” in chips and patch pieces. That is why. ANY CLAY or Organic Material is devastating to concrete. Curing Aids weaken it. Allow 7 days to 50% strength and 28 days to 95% strength.
Norman Cooney | September 1, 2016
|
First and foremost “YOU NEVER POUR CONCRETE”!!!!!!!! It is usually “PLACED IN FORMS” if you can pour concrete it will be of little use to you!!! Anyone you talk to that refers to “CONCRETE” as CEMENT” stay far away from him,he knows nothing about the business and if he call his business a “CEMENT” company,avoid him like the plague!!! There are only a few companies that produce “CEMENT”??? CEMENT is just one item used in the making of “CONCRETE” and any company that uses CEMENT in its name avoid unless ir produces CEMENT as a finished product!!!! Most people that are in the field
of placing and finishing concrete have no idea what that product is or what it is called..So remember “CONCRETE” is placed in a form and the less you move it or”FINISH” it the stronger it will be!!!! Once you place cement,sand or an aggregate into a mixer and integrate it all and ADD WATER to it “PLACE” it into the desired forms level it and broom finish it and leave it be except for hydration,do not leave it bake in sun without watering it so it does not dehydrate too quickly and shrinks too much from dehydration!!!!~!
Nick | September 1, 2016
|
Great article. Thank you!
Malcolm McClure | September 1, 2016
|
You might mention that wet concrete can be quite caustic. Wear protective clothing to keep it off your skin and wash up when you are done. And always wear rubber boots when walking in wet concrete.
Don_in_odessa | September 2, 2016
|
Concrete is not really caustic. The “burn” is actually caused by crystals permeating and growing into one’s skin. Concrete sets by a process of crystallization. Those crystals can continue to grow for several days in the body and for months in poured (placed) concrete.