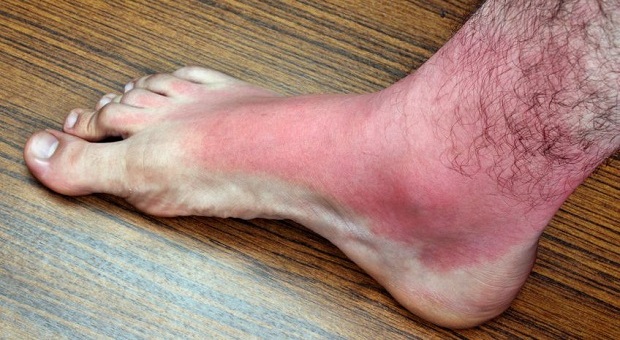
Sunburns are no fun and are really bad for your skin. Not only are sunburns bad, too much sun can damage your skin and cause sun spots and wrinkles.
While it’s true that you may look great with a tan, you’ll pay for it with elephant skin later. The problem is that commercial sunscreens are packed with chemicals and have a limited shelf-life, which makes them poor stockpile items.
You know there are cancer-causing chemicals in your food, and sunscreen is the same. You may slather on the sunscreen to prevent skin cancer, some of the chemicals in it have actually been linked to cancer. Oh, the irony.
Some ingredients can also disrupt your endocrine system and many people have skin allergies to sunscreens/blocks. Three great reasons to make your own sunscreen.
The first thing you need to understand before venturing into the land of homemade sunscreen is the difference between sunscreen and sunblock. Though the two terms are used interchangeably, they function differently.
Also, it’s important that you know the difference between UV rays before setting out to make your own sunscreens. UVB rays are main cause of sunburns and UVA rays, which penetrate more deeply, are more closely associated with skin damage such as wrinkling and leathering, and play a larger role in causing skin cancer.
In other words, you want something that’s going to protect you from both!
What is Sunscreen?
Sunscreen is a chemical protectant. It’s absorbed by your skin and chemically filters out and absorbs the sun’s UV rays before they can penetrate and damage your skin. They use benzophenones that screen UVA rays and salicylates that screen UVB rays. Oxybenzone, octyl methoxycinnamate, and octyl salicylate are common ingredients.
If you’re buying commercial sunscreen, make sure that they contain both classes because older formulas don’t have the UVA protection.
What is Sunblock?
Sunblock, as the name implies, actually blocks the rays from penetrating your skin. It’s a physical protectant that provides broad protection from both UVA and UVB rays. The two most common ingredients are titanium dioxide and zinc oxide. This is the white stuff stereotypically seen on lifeguards’ noses. It’s available in clear, too.
Let’s Go Natural!
OK, now that we have that straight, let’s talk about natural alternatives.
Unless you’re going to be out long enough to be worried about burning, it’s a good thing to get a bit of sun because that’s how our bodies get vitamin D. With so many of us working inside, vitamin D deficiency, which is linked to cancer and mood disorders such as depression is becoming more prevalent. Moral of the story – get a little sun each day.
To determine how much protection you need, use the SPF. You probably know how long you can be in the sun without burning. All an SPF number indicates is how many times longer you can be out in the sun with the product on without burning. In other words, if you can be outside for 20 minutes without getting pink and you get an SPF 10, you can be outside for 200 minutes (3 hrs. 20 min). Easy.
I personally prefer to use zinc oxide as block in addition to my oils, which are typically low SPFs, plus most oils only protect against UVB rays. Also remember that if your mixing oils, don’t ADD the SPFs together.
For example, hemp seed oil has an SPF of 6, and almond oil has a SPF of 5. The total SPF of this combination would be SPF 6. They don’t pile on top of one another but they do have different benefits for your skin and may break down at different rates.
Here’s a guide to help you determine how much zinc oxide or titanium dioxide to add into your oil or cream:
You may be thinking right now that neither zinc oxide nor titanium dioxide sound very “natural”, but you’d be wrong. They also aren’t systemic like the parabens and other nasties in commercial sunscreens.
The difference between regular zinc oxide and micronized or nano is that the latter two will make a clear sunscreen, but regular zinc looks white on your skin. You can always add fun colors for the kids – you’ll never wonder if you need to reapply!
Note that you have to use a high percentage of either product to get a high SPF, but it’s not that horrible; when compared to the price of commercial sunscreens, the cost of using either of these ingredients is actually less, especially if you use it in coconut oil or another relatively inexpensive oil.
Warning: If you choose to use micronized or nanoparticles of zinc, use a mask. It’s not toxic on your skin and doesn’t absorb into your system via your skin, but breathing it is a different story.
SPFs of Essential Oils
Now, let’s discuss the SPFs of a few oils. Remember that it’s important to use high-quality, pure oils anytime you’re going to use them on your body or consume them. Also, don’t use citrus oils as they can increase your skin’s sensitivity to sunlight.
Carrier oils such as coconut oil, help stabilize the essential oil and dilute it so that it’s usable. Often, pure oils have an extremely strong smell and can be irritating to the skin if pure. They may also evaporate quickly. Carrier oils help all of these issues. There are plenty of uses for animal fats such as lard, but stick with plant oils.
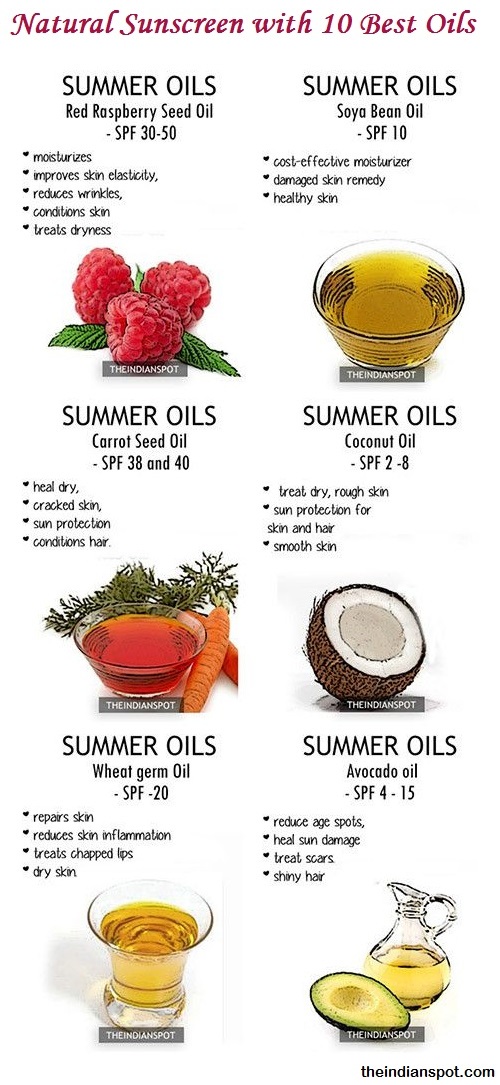
- Red Raspberry Oil – SPF 30-50, and protects against both UVA and UVB. Also great for eczema and psoriasis.
- Carrot Seed Oil – SPF 40 (Definitely needs a carrier oil)
- Wheat Germ Oil – SPF 20 (Packed with vitamins)
- Macadamia Oil – SPF 6
- Avocado Oil – SPF 4-10
- Olive Oil – SPF 2-8
- Shea Butter – SPF 3-6
- Almond Oil – SPF 5
- Sesame Seed Oil – SPF 4
- Hemp Seed Oil – SPF 6
- Jojoba Oil – SPF 4
- Coconut Oil – SPF 2-8
You may notice that some of the oils with lesser SPFs will make a great carrier oil! Coconut Oil is my personal favorite because it’s inexpensive (relatively) and it actually smells like sunscreen!
Textures for Homemade Sunblock
Now that you have your oils and some ideas for carrier oils and know how to use zinc oxide, it’s time to talk about texture.
- If you want it oily, use an oil carrier such as coconut oil and then leave it as-is after you mix it.
- If you want it like lotion, use shea butter along with a carrier oil. If you want it just a bit thicker, add more shea butter or a small amount of beeswax.
- If you want it in a block, or want to make sunscreen lip balm, use beeswax along with shea butter and a carrier oil.
- If you want it waterproof, use beeswax along with the shea butter and carrier oil.
- If you want to increase the SPF, add more zinc oxide.
- Remember that ALL sunscreens need to be frequently reapplied, especially if you’re in the water or sweating.
- Use 1/2 teaspoon vitamin E or tea tree oil per 8 oz. as a preservative.
How to Prepare Sunblock
Now, let’s pull it altogether! These SPFs have not been evaluated by any authority and are estimates only. You can do the math for yourself when cooking.
Sunblock 1 – about SPF 20, no zinc oxide
- 3/4 cup coconut oil
- 2 tbsp. beeswax
- 2 tbsp. shea butter
- 15 drops red raspberry seed oil
Melt the coconut oil, beeswax, and she butter together. Allow to cool a bit and add the raspberry seed oil. If you want to boost it to a 30-40 SPF, add 2 tbsp. zinc oxide.
Sunscreen 2 SPF About SPF 20
- 1/4 cup coconut oil
- 1/4 cup shea butter
- 1/4 cup beeswax pellets
- 1 tsp. carrot seed oil
- 1 tsp. raspberry seed oil
- 1 tsp. vitamin E oil
- 1/4 cup shea butter
- 2 tbsp. zinc oxide
Melt shea butter, coconut oil and beeswax until it’s liquefied. Combine the zinc with a small amount of oil, or with your essential oils, then add everything to the liquefied carrier oils.
I’ve included these recipes because they’re good base recipes to get you started. Add your own touches and do the math to figure the SPFs. Now that you know what the SPFs of some of the best oils for sunscreen are and have a decent knowledge base about the entire subject, play around with some recipes of your own.
Try some lip balm, too – remember, all you need to do is add more shea butter or beeswax to thicken it up a bit!
If you have anything to share about making natural sunscreen or other natural remedies, please share it with us in the comments section below!
This article has been written by Theresa Crouse for Survivopedia.


