Cooking with a solar oven is a great alternative when you don’t have (or don’t want to use) electricity.
Just remember there are some big differences between the different types of solar ovens available on the market.
With just a little practice, cooking on a solar oven is a piece of cake, and these seven recipes are exactly what you’ll need to prepare a good meal.
And if you’re wondering how could I proceed all these mouth-watering recipes without a proper oven, keep reading the article below, because we have a great offer up for grabs!
Follow These 10 Advice for the Best Solar Oven Cooking!
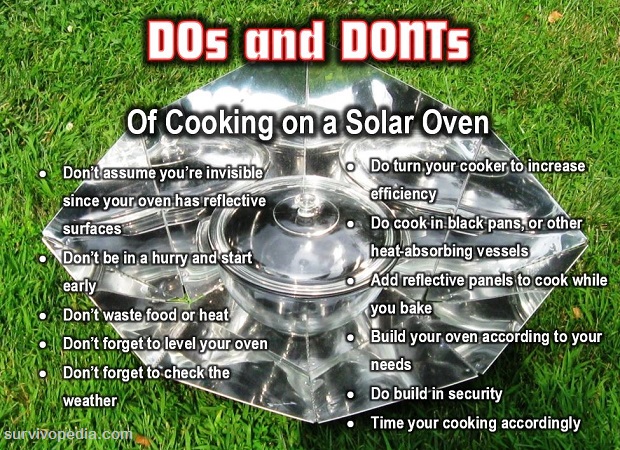
Since there are so many variations of solar ovens, it’s hard to set any hard and fast rules but there are some dos and don’ts that are applicable to pretty much all of them.
Don’t Assume you’re Invisible
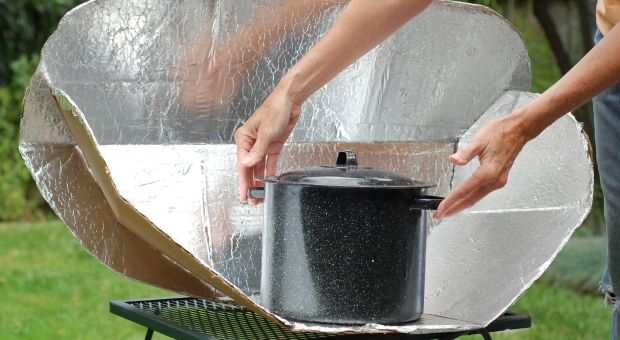
One of the reasons that solar ovens are good is because they’re smokeless; they operate solely off the power of the sun. However, most ovens depend on a shiny surface to reflect the sun to cook the food (think 80s-style tanning with the silver tray under your face).
This means that you have a reflective surface that is easily seen from up to miles away depending upon how flat your geography is. Though there won’t be smoke, there will be shiny, so make sure that if you’re using your oven and trying to hide that you are completely surrounded in such a manner that it can’t be seen from a hilltop or anywhere else.
You won’t be able to do much about planes and you can’t (generally) use it in the dark, but you may be able to position it in such a way that you can use it without giving away your location. Just plan carefully.
Don’t be in a Hurry and Start Early
Many solar ovens don’t get super-hot, so you’re going to need to allow plenty of time to warm it up and then more extra time to cook. Food will likely take longer to cook in a solar oven, though that won’t always be the case.
If you’re planning a meal such as beans or stew that takes hours to cook, you need to start the meal early. Remember that you can’t typically use your solar oven after dusk because, well, it’s powered by the sun.
Don’t Forget to Check the Weather
Remember, you’re counting on the sun. If it’s raining, you better have back-up rations if solar cooking is your only heat source. As a matter of fact, let’s make that a subsection here: Always have a backup cooking method.
If it’s smoggy or hazy, your food won’t cook as quickly and you’ll have to pay closer attention to make sure that your oven is pointed in the right direction.
Don’t Waste Food or Heat
Don’t waste food scraps or that precious heat – if you’re cooking supper tonight and planning a soup for tomorrow, use the leftover veggie and meat scraps to make a stock for tomorrow’s soups.
Put them in a jar or two, add salt or some vinegar or wine to pull the calcium out of the bones and into your stock, season it and toss it on the cooker
Don’t Forget to Level Your Oven
You’ve bought a super fancy oven, and you’re all excited to give it a shot. It’s set up and ready to go and you’re going to try something quick and easy – cookies.
You warm up your oven, you mix up your dough, you place the cookies on the sheet and slide it into the oven. Now all you have to do is wait, and you’re going to have ooey, gooey, deliciously crispy cookies.
You come back 20 minutes later and you have long, oval, thin cookies, which are crispy and delicious, but ugly as a mud fence in a rain storm because you forgot to level your oven. Now, the end result here is just ugly cookies, but if you were cooking cornbread or a pie, you would have had a mess on your hands.
So, the moral of the crooked cookie story is this: Level your solar oven!
Do Turn Your Cooker
Especially if you’re using a box cooker, it’s important that you turn it as you cook in order to increase efficiency. This isn’t as important if you’re cooking something quickly but if you’re cooking for longer periods of times (more than an hour), you definitely want to turn your solar oven in order to get the most out of it.
If you have to be away from your cooker for more than an hour or so and your food is going to take a few hours, point it to where it the sun will be directly on it in an hour and a half or so. As with all things survival and homesteading related, use your head and adapt to how long you’re going to be away.
Do Cook in Black Pans
Because you’re using reflection to direct your heat, it only makes sense that you use a non-reflective, heat-absorbing cooking vessel. A thin, black metal is best because it’s lightweight and dark colored. Cast iron is also good for a couple of reasons. First, it’s black and absorbs heat. Second, the iron holds heat for a long time.
As a matter of fact, even when I’m making cakes or cornbread in my iron skillet in a regular oven, I take it out a few minutes before it’s completely done because it holds so much heat that it keeps cooking for several minutes after the heat source is eliminated. The downside to iron skillets is that they’re heavy.
If you can’t use black cookware, use glass. Using aluminum or stainless steel is counterproductive. Never cover your food with foil.
Add Reflective Panels to Cook While You Bake
If you really want to crank up the temperature to fry foods, add additional reflectors that reflect the sun directly onto the food as well as the ones used to heat the oven. Elevate a shallow pan so that it touches the glass, then attach the three-panel reflector to aim the extra light onto your food. You can even do this while baking other products inside the rest of the oven.
Build Your Oven According to Your Needs
If you’re still experimenting with solar cooking, get the function down before you worry about a solid, permanent form. Also, if you just want to cook for yourself, you won’t need a full-sized cooker.
Do you want it to be portable? Do you want to cook for a large family? What size pans will you be using? Your cooker needs to have at least an inch headspace above your pot, including the lid. Build according to what you need.
Do Build in Security
If you’re building your own solar oven and it’s going to be substantial (not made from a pizza box) build in a way to padlock it to something larger. For example, you could build a place to attach a padlock to the hinges of a box cooker.
Time Your Cooking Accordingly
Just like when you’re cooking inside, don’t add carrots and spinach to a soup at the same time and expect them to cook evenly. Add hard vegetables first, and if you’re cooking more than one dish, start the one that takes longest to cook before you start the faster-cooking one.
Just use your cooking common sense that you use in the kitchen. If you don’t have any yet, you quickly will, as we help you cook your first meal on a solar oven with these 7 recipes.
And Finally, 7 Survival Recipes to Cook on Your Solar Oven
Though you can convert many of your own personal favorites and use them with your solar oven, these recipes are written specifically for that cooking method. Some of these recipes for solar ovens are basics, and some are for more luxurious dishes, but even in a survival situation, tasty treats can go a long way toward boosting morale.
After all, who doesn’t feel a little better after eating a good brownie?
Remember that times are going to be different depending upon how hot your oven gets. Some can get as hot as 425 degrees while some can barely break 325. Because of that, take the times with a grain of salt and start checking your food 5 minutes of so before the time listed to see if it’s done.
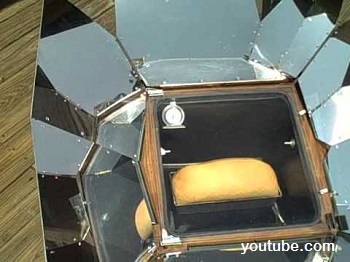
Fresh Baked Bread
This recipe will yield two loaves of bread or about 24 rolls. Remember that, unlike biscuits, the more you knead bread, the better it will be because kneading activates the gluten, which provides the elasticity.
6 c bread flour
- 2 tsp salt
- 2 tbsp. olive oil or butter
- 2 1/2 c very warm water (not hot!)
- 2 packets quick rise yeast
- 1 tbsp. sugar
Stir the yeast into 1 cup of the warm water and set aside so that it can activate.
Sift together the flour, salt and sugar, than add the butter or oil and the yeasty water. Stir together, then mix in the remaining water 1/2 cup at a time until your bread is kneadable but not sticky. You can do this in a bowl or on a lightly floured surface.
Continue to knead by folding the dough in half on itself and pushing together until your dough is elastic and shapes easily into a loaf. If you need to add a bit more flour or water to reach a good consistency, do so. Count on kneading for at least 5 minutes, and maybe even 10.
Place in a warm place, rub a tsp of oil over the top, and cover with a clean towel. Allow to rise until it doubles in size, then punch in down, knead it just a bit more, then divide your loaves or rolls, place in bread pans, and allow to rise again. Place in your sun oven, which is hopefully around 300 to 325 degrees F, and bake for about 45 minutes.
Tap on your bread and if it sounds hollow, it’s done.
Pot Roast
- 3 pound rump roast
- 1 tsp salt
- 1 tsp pepper
- 1 tsp garlic powder or 2 tsp minced garlic
- 1 large onion, quartered
- 4 medium potatoes, cut into 1 inch cubes
- 5 carrots, cut into 2 inch chucks
- 1 tbsp. Italian seasoning
- 2 c beef broth (or 2 cups water with 2 bouillon cubes)
Put the roast in a roasting dish and sprinkle with salt, pepper, garlic, and Italian seasoning. Add the veggies around the roast and then pour the bouillon in. Place in your solar oven and bake for 3 hours or until tender.
Meatloaf
- 1½ pounds ground beef
- 1/2 c ketchup
- 2 tbsp. mustard
- 2 eggs
- ¼ cup chopped onion
- ½ tsp salt
- ¼ tsp pepper
- 1 tbsp. Italian seasoning
- ¾ c rolled oats or breadcrumbs
Mix all ingredients in a mixing bowl thoroughly then place in a loaf pan. Bake in solar oven at 350 for 1 1/2 – 2 hours or until meat reaches 160 degrees inside.
Barbeque Chicken
Great served with fresh vegetables, corn on the cob and cornbread. You can also serve it with rice to feed more people. However you want to serve it, it’s delicious!
- 6 chicken quarters or breasts, or a dozen legs
- 1/2 c vinegar
- 2 tbsp. Worcestershire sauce
- 1 tsp paprika
- 1 tbsp. sugar
- 1/2 c ketchup
- 1/2 tsp pepper
- 1/4 tsp salt
- 1 tsp garlic powder
- 1/4 tsp liquid smoke (optional)
Combine all ingredients except for chicken. Just FYI, this is a good sauce to make ahead and can! Place chicken on a baking sheet and paint the sauce onto the chicken. You could marinate it in it for an hour if you’d like.
Place the chicken in the solar oven at about 325 degrees and bake for 45 minutes, saucing again about half way through. Chicken should be 165 degrees F in the center, not on the bone. A good tip is that the chicken will pull easily away from the bone.
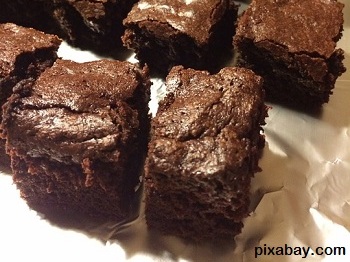
Solar Brownies
Brownies are one of those comfort foods that will definitely boost morale with very little work, time, or special ingredients. Makes 1 8×8 pan or 4 pint jars.
- 2 c sugar
- 2 c white all-purpose flour
- 2/3 c dark cocoa
- 1/2 tsp baking powder
- 1/2 tsp salt
- 1 tsp vanilla
- 1 c shortening
- 4 eggs
- 1/2 c chopped nuts, optional
Cream sugar, shortening and vanilla together in a bowl, then beat in the eggs.
Add dry ingredients and mix until batter is smooth – about 2 minutes.
Fold in nuts if you’re using them. Feel free to toss in mini marshmallows, chocolate chips, or whatever else you like in your brownies. Batter will be thick.
Pour into a greased and floured 8×8 pan and bake in solar oven at 350 for 35-45 minutes or until brownies pull away from the sides of the pan.
Note: If you’d like to make these ahead in pint jars, simply combine dry ingredients well and add to jars. Write complete recipe on an index card and attach to the jar. To extend shelf-life, dry-can.
Apple Crisp
Apple trees grow naturally and prolifically in every state in America, so this is a dessert that will barely touch your food supplies in the fall. It’s also extremely easy to make and, except for the peeling process, it’s not difficult to make enough to feed many people. You can also rehydrate dried apples to make it.
Filling:
- 6 c apples, peeled, cored and sliced into 1/3 in slices
- 2 tbsp. lemon juice
- 3 c water
- 2 tbsp. cornstarch
- 3/4 c sugar
- 1/3 tsp salt
- 1 1/2 tsp cinnamon
- 1/2 tsp nutmeg
I always keep apple pie seasoning on hand and use this in replace of the cinnamon and nutmeg.
Topping:
- 1 c rolled oats (not instant)
- 1 c brown sugar
- 1 c all-purpose flour
- 1/4 tsp salt
- 1/3 tsp baking powder
- 1/2 c cold butter
Place apples in a large bowl and sprinkle in the lemon juice. Toss to coat. Add remaining ingredients and stir well to coat the apples. Pour into an 8×12 pan and cover with a lid. Bake in solar oven at 350 degrees F for about an hour, or until apples are almost tender.
Combine topping ingredients by cutting together into pea-sized pieces with a fork or pastry cutter. Remove the lid from the apples and sprinkle the topping evenly over them. Put it back in the solar oven and cook for another 30 minutes or until the topping is brown and crispy and the apples are tender. Warm, homey, nutritious (for a dessert) and comforting.
To make peach crisp, simply substitute the same amount of peaches for the apples.
You can also make this by using your canned apple pie filling and skipping the first stage of cooking.
Cornbread
This is a dish that every survivalist and homesteader should know. It can be used as a bread or as a dessert – serve it with butter as a savory side for meals, or slather it with jam as a delicious dessert.
- 1 c cornmeal
- 3/4 cup all-purpose flour
- 1 tbsp. sugar
- 1 1/2 teaspoons baking powder
- 1/2 tsp baking soda
- 1/4 tsp salt
- 6 tbsp. butter, melted
- 2 large eggs, room temperature, lightly beaten
- 1 1/2 c milk or buttermilk
Combine dry ingredients thoroughly then add butter, eggs, and milk. Combine ingredients thoroughly and pour into a greased 8×8 pan. Bake in solar oven at the highest temperature for 20 minutes or until a toothpick inserted in the center comes out clean. If your oven doesn’t get that hot, just extend cooking time until it’s done. The top should be a good indicator of when it’s done as it will brown fairly evenly as it cooks.
Buttermilk adds tenderness and lightness to batter because the acids chemically interact with the baking powder or baking soda. If you want the tang of buttermilk but only have 2 percent or whole milk, add a tablespoon of vinegar or lemon juice to it and let it set for a few minutes before adding to the mix. It won’t have the thick creaminess of buttermilk, but will function the same.
Remember that for all of these recipes, you can use dry milk, canned or dried meat, fruit, or vegetables, and powdered butter and eggs. Just reconstitute according to directions and you’re good to go!
For the most part, cooking with a solar oven is extremely similar to cooking with a regular oven, except you may have to cook things longer. Nearly all of your favorite recipes, especially crock pot recipes, will translate right over.
Don’t think that you’ll have to skimp just because you don’t have a “real” oven, because this problem is now easier to solve that you have ever imagined. We have the best deal for you if you decide to buy a solar oven, and it’s now available on Survivopedia.
Click the banner below to take advantage of this incredible offer, and remember to use the promo code survivo2016 at checkout!



 6 c bread flour



Gerald Garnto | September 15, 2016
|
Proof-reading is still advisable, even though there are spelling and grammar apps in today’s tech environments.
I’m sure you meant the best times to cook with solar energy ‘is between 11:AM and 3:PM’. The photo insert into the upper paragraph says “1.AM and 3.PM”.
It’s still rather dark at 1:AM in most places . . .
Survivopedia | September 15, 2016
|
Thank you for noticing the error, Gerald Garnto. We fixed it up.
Survivopedia | September 15, 2016
|
Thank you for noticing the error, Gerald Garnto. We fixed it up.
Ed | September 15, 2016
|
With the exception of the breads I do not see use of the other recipes when,not if, the SHTF.
What is needed is more, lot more, on cooking freeze dried and can storage food
Survivopedia | September 15, 2016
|
Stay tuned for the next article, Ed. You knocked on an opened door. 🙂
Sparks | July 26, 2017
|
I agree more info on solar cooking freeze dried and other storage food stuffs
For 1 or 2 individuals not a Army
Pingback:Surviving Winter: 10 Easy Ways To Cut Your Electricity Bills | Survivopedia | December 29, 2017
|
How do you get bread to brown on top? | July 2, 2018
|
How do you get bread to brown on top?
Alex | July 3, 2018
|
Hello,
Thank you for commenting. If you want to have it brown on the top, you can wash the top with some milk or the mixed yolk of an egg.
Let us know if it worked!
Alex from Survivopedia 🙂