Hey, this is Tyler with Survivopedia.
I’m gonna knock out a quick video on how to do a snare.
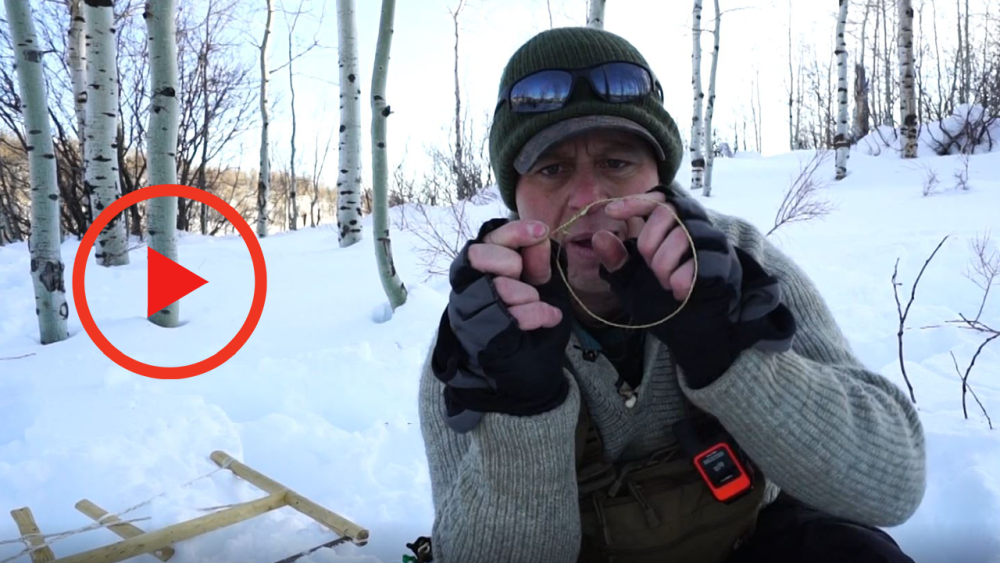
Got one in my pocket here. This is the finished product. There’s some intricate things, just like someone who… just like me watching someone play the violin. I don’t know what I’m doing. I go, oh, I can do that. I have no idea what I’m doing.
When it comes to watching something like this there are some intricacies that I need to point out so, you know what you’re seeing.
So, this, this bend right here, there’s two bends in this and it’s basically forcing itself open. Right? So, what we want to do is to, and I’m getting a little bit ahead of myself, I actually show you how to make this in a little bit.
So we want to bend it so that it closes automatically and then we want to open it until it grips on that little edge. So, what’s going to happen also, there’s two little bars, which you just leftover metal. So, once a rabbit goes through and it grabs that little barb, it’s going to pull. And once it goes past this point, should automatically push itself shut. Right? Change the angle on this a little bit. So now, if I test it, it just goes automatically.
So, the reason that we want this to happen and then of course on this backside I’m either going to make it longer or I’m going to tie it to some string.
The reason I don’t make the whole thing wires it’s a waste of wire. You want wire where the animal can bite at it and claw at it. Outside of that you can use string or whatever you want. So, if we look at just the actual mechanism in the way that it closed, there’s a bend here and then there’s a springiness to the trap.
So, if the rabbit goes through, it’s going to grab these, these little barbs that are hanging off and once it goes past that bend it automatically closes and that automatic clothing is just enough that it startles the animal and runs. When they run tights it down and just quickly it’s a quick passing, quick death, so that there’s no suffering.
This is a way, I learn from a SERE instructor up in Canada, to make these the snare traps. I’m going to show you how to make him right now.
So the first thing you need is a little bit of wire. This is 20 gauge snare wire, its brass wire.
The reason we do that is because if a deer steps in this brass wire, the deer is not going to be held by it. They’ll be able to wiggle it and pop it free and get out. If a rabbit or a squirrel is caught by something of this low gage, they’re not going to get out.
So, you can create this snare with single strand or you can create it with double strand.
The double strand, and double strand locking are going to be stronger and they’re going to handle larger animals.
So, maybe I’m targeting a trash Panda, right? Maybe I’m targeting a raccoon. Or maybe I’m targeting a porcupine or maybe I’m targeting a rabbit, or maybe I’m targeting a squirrel. If we’re just targeting a squirrel, we just do something small, right? I’m quite literally. There’s my squirrel snare, right? Break that puppy off. And I’m good to go.
I’m going to bend it tight and then I’m going to leave that little dent so that when I set it up and this go passed that dent it should automatically tighten up. I got to tighten up a little bit more.
So again, there’s a nice large piece here as soon as the scroll pulls a past, cranks right down. I would secure this to the other side of a tree or whatever. All I did was wrap that once or twice. It’s nothing fancy. Squirrels do not require a huge amount of work. They’re small. So, if we’re going to make the larger trap, pull out a bigger chunk, and I’m going to have to double this over. So, I need to make sure I have enough length to recreate one of these.
Now, a lot of people get worked up about using a Leatherman or something to pinch this. You don’t need it. All you need to do is tie a slipknot. Right. Tie a slipknot, make it snug and then yank on. That quick friction is going to break it.
Okay, that’s just a slipknot. If I do this right, breaks it right in half. I don’t need to bend it or do anything silly with it and I can put the remainder of this stuff away.
So now I’m going to take this guy right here. Get the ends together like this.
If you’ve got a pencil or something, stick it in there. But you just can’t start twisting it now. Before I get too far, I’m going to create a loop here and wrap it around.
This loop, is this loop in the end. Right? Get myself a little more length. A pencil is great to use. I don’t have one. So I’m going to use my finger which is about what you normally… Everybody’s got fingers, I hope.
Okay, and I’m going to leave these little grabbers hanging off. I’m doing that on purpose. So I doubled it over and then on the loose end, I created that guy right there. Okay, that’s the loop with a twist and some little hangers. These are fur grabbers.
Now, I’m going to take this whole thing and twist it. See if I can use a carabiner or something. Think outside the box. Try this to a tree, whatever you got. Let me twist in for a minute.
All right! So I twisted the crap out of that. If you don’t have a carabiner like I do. Yeah, just be creative. Use a pencil, use a piece of a stick. Use your fingers, whatever you got. All right, so I twisted it a bunch of times. So I have the center of the court there. It’s all twisted. And then, I brought it up here, put it over, and I made this about the diameter of my pinky wrapped around, until I got two little legs hanging off there.
Those legs are important. I’m going to take the raw end and put the center and through it, right?
And then I’m going to tighten it up. I can tighten it around the can, I can tighten around my hand and however, I want to do it. I just need to induce some bend into it. Okay, so that does that automatically.
And then, somewhere, right about here I’m just going to create a little shelf, … these wings are a little bit too long.
I want to stick out in both directions. So, as I open this up to that little shelf and little shelves, a little too far. I want this to be about fist height and I want to put it about if this is the ground, I would put it about that high off the ground. So, the rabbit will go through it.
I want to funnel the rabbit and want to pick a location that I know that they’re going. In front of their den, in front of the water, in a super high pathway. If you find green poop, they will be back to reeat that green poop.
You can put it there, put it somewhere that you know, that they’re going to go. So, just like I said a minute ago, I create my loop. I’ve already introduced spring into it. I’m going to kind of change the direction of these little wires.
I want them to probably front and back on the inside, so that if a rabbit comes through, it’s kind of firing off a little bit too easy there. The rabbit comes through this direction, their fur grabs this way. It comes through that direction that fur grabs, that way. And then, as it starts to close goes over that little loop. Tie this guy up, even a little more.
Kind of getting a little overkill that 5% extra effort equals 100% extra catching of the rabbits. It’s not exactly how the quote goes.
So there’s my snare. I’m going to put this guy somewhere on a tree. Ideally something that’s already got roots, that that rabbit or whatever you catch it’s not going to pull out as it goes through that. First, it’s going to grab it. You can jump past there. It’s going to run and boom, Bob’s your mother’s brother.
All right, guys. We hope that was valuable to you, check out your local laws before you make or use these.
And if you’re going to use some kind of wire, use actual trapping wire that will break, if some large game steps in it like this, do that on purpose. When I double this up, it doubles the strength, right? So if I add 22 gauge wire treat it like half of 22 is like 12 and a half, right? My math is horrible, the maths like 11, 10 or 11 gauge wire. The reason we double this up is to add strength. If you’re just going for small game, don’t double it up and that’s it.
Thank you for watching. Maybe I’ll go get me some rabbit!


