Ask a prepper what’s in his pockets, and he’ll tell you about his knife first, for sure. But just any knife will simply not do! And every prepper has his favorite one, so recommending the best knife will certainly not please everyone.
But there are knives better than others and everyone agrees on that. And what’s even more important when choosing your knife is a set of criteria that you have to keep in mind before investing in one.
The Way You Choose It
A knife is a personal thing and everyone has their own set of circumstances when choosing it. Whatever your choice is, the perfect survival knife is the one that fits your needs and skills best.
You will need a thin blade for some tasks such as cutting feather sticks, and it would be an efficient cutter. But a thin blade would make a lousy fighting knife, because the blade would roll too easily. It might break contacting bone, and it could snap off or get bent on a thrust between the ribs when you try to withdraw the blade.
You also need a sharp point blade: it is a better defensive shape than any other, due to its ability to stab
So you have to consider the thickness and the length of the blade: it should be small enough for trap making, but also spilling logs, for example. Also think about the shape and the angle of the grind.
Choose steel over any other material for the blade, but be aware of the differences between stainless steel and carbon steel. Stainless steel knives do not hold their edge as long, but are less likely to rust compared to carbon steels, which will rust easier if exposed to air and moisture. Stainless steel is an alloy with a minimum of 10% chromium by mass. Stainless steel does not rust or stain by water as ordinary steel does. When heated the chromium becomes chromium oxide that acts to form an air and water tight film that seals off the metal. This steel comes in many grades and finishes.
Be careful about the handle material and how aggressively it is checkered, if it is. You don’t want a guard that will get tangled in clothing or give you blisters, and you need scales or handle material that won’t slip when it gets wet, bloody or muddy, but that won’t tear up your hands in prolonged use.
How You Understand the Limits of Your Knife
Each material has natural limits that it cannot surpass. Knives are not exceptions of this rule. Make no mistake, knives are made of steel and steel should also be used with caution. Different knives are created for different purposes. It’s simple: you really can’t use a fillet knife to skin a deer.
Though you may try your hardest, the knife wasn’t designed for that task and will not only perform poorly, but will also have to suffer as a result. So instead of choosing the wrong knife (or an all-purpose-blade for any and all tasks), read up on useful guides on choosing the right knife and work from there.
How You Clean Your Knife
Just because you use your knife regularly doesn’t mean that you shouldn’t also regularly clean it. Always keep your knife clean, clean the blade and handle after each use.
Do not soak the knife in water. Instead use a mild solution of soap and water on a clean rag or paper towels should remove any dirt and debris that may have accumulated during use.
Running water is often enough, but you must always ensure to dry the knife thoroughly. This is a step that most beginners ignore and end up paying the price for. A knife that isn’t completely dry will never be rust free. Ideally, you should use a cloth that’s used specifically for this purpose.
How You Oil Your Knife
After cleaning or exposing the knife to moisture the knife most be completely dried.
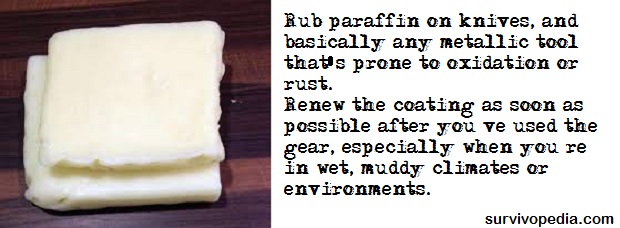
Use WD-40 on the blade only to displace any moisture to prevent water spots and oxidation from forming (WD-40 is a solvent, not a lubricant), then oil all metal parts. There are multiple option on the market: you can use a 3-in-1 mineral oil, Dri-Lube (made by Remington), Rem Oil or other similar products.
Remember to oil the knife regularly. Finger prints and weather are the primary cause of rust and corrosion.
The Way You Store Your Knife
Do not store the knife in a nylon or leather sheath that came with the knife because it traps moisture and cause the knife to rust. A cardboard sheath will wick the moisture away from the blade’s surface and prevent dust from accumulating. Keep this knife stored in a cool low humidity area while in storage.
How You Repair Your Knife when It’s Needed
A knife is bound to take the occasional beating, however, most knife owners will hurry and repair the blade themselves instead of taking it to an authorized technician.
Note that some high-quality knives have a lifetime warranty that becomes void when you attempt to repair them.
The Way You Sharpen Your Knife
A dull knife is just as useful as a fork in a survival situation. This only leads to frustration. Now, in such a sticky situation, there are things that you can do to sharpen your knife. In all others, use the multitude of tools that ensure proper sharpening.
Whetstones are the oldest (and perhaps simplest) way to sharpen knives. Make sure that you always maintain a consistent contact angle between the whetstone and the knife and respect the angle of sharpening that your knife came with.
Sharpening rods are another popular sharpening system because you only need to position the knife vertically on the sharpening rod and swipe it down while pulling the knife towards you.
The Way You Make Use of It
Steel is a sturdy material: it has certain elastic capabilities, and resists abrasion, corrosion and vibration. But it has its limitations, and you’ll surely damage your blade if and when those limits are exceeded.
The tip of your knife is its most delicate part. It’s also the most useful because it makes precision tasks particularly simple to complete. That’s why you should always try to protect the tip. But more often than not, even when a screwdriver is readily available, knives are used in their stead.
Good quality knives won’t wear so easily and may withstand multiple substitution rounds, however, they will become damaged in the long run. Opening cans is another such example. Granted, some multi-purpose knives may be used to open cans, but a high-quality hunting knife, for instance, will certainly suffer.
Don’t use your knife as a makeshift shovel: your knife will come into contact with hard rocks that will end up chipping your blade. Also avoid using it as a makeshift fire striker, because you will damage the blade. In fact, when a blade is made to pry in small spaces, it is forced in the direction in which its structure is less resistant. This may result in the blade being curled or damaged.
How You Take into Account the Environmental Factors
Extreme temperatures are also harmful to your blade. Sub-zero temperatures can make the steel brittle and increase its sensitivity to vibration and impact. On the other hand, extreme heat may damage the hardening of your blade.
You know that something’s wrong when your blade doesn’t return to its normal color after being cleaned. If it displays shades of dark brown, yellow, or even worse, blue and violet, you know that the hardening is lost. In those portions where the discolorations appear, the steel of the knife is softer and can be damaged with ease.
Environmental agents are just as likely to corrode a blade, especially if the steel is non-stainless steel. Some knives come with their own holster, but consider protecting your blade if you don’t want it damaged.
The Way You Carry It
A knife is a tool, and also a weapon. Be aware that there are laws referring to concealing a knife, and there are places where you can never carry it: schools, courts, planes, most federal buildings and similar institutions of state or local government. Having a knife that appears utilitarian and harmless at the same time, saves you a lot of troubles.
As you see, owning a perfectly-fit-for-you survival knife is more about skills than about choosing a product over another. As always in life, is not the strongest or the most intelligent who will survive, but those who manage to make the most of what they have.
This article has been written by John Gilmore for Survivopedia.






Greg A Workman | February 22, 2016
|
There is only few things you need to know about a knife as a survival tool.
1. Never buy a knife made in China, India or Pakistan, they are junk, pure junk regardless what ‘famous’ maker is on the thing! When a good knife made in America, or Europe, or else where, cost $150 to $200. Then moves their operation to China, & it drops to 30 or 40 dollars. & most of that is profit. You get what you pay for. JUNK!
2. Stay away from ‘Rambo’ trash! They are too big too heavy, designed more for show than go!
3. You never run out of ammunition!
4. You can’t be afraid to get close!
Pingback:What Makes A Good Survival Knife | NewZSentinel | February 22, 2016
|
Pingback:What Makes A Good Survival Knife | Bsn Global News | February 22, 2016
|
Richard R. Martin, Jr. | February 23, 2016
|
RE: Lube & Protecting Metal Components
Kano-Kroil makes lubricants/protectors for almost everything metal; their products will, in due time, make WD-40, Rem-Oil, 3-in-1 mineral oils, and CLP ALL obsolete.
Bill in idaho | February 24, 2016
|
I have made my own knives for over 55 years. You need to know How to Perform > 7 Specific Steps 1. Choosing the Steel
I begin with a 12-13″ long strap of “Cold-Rolled” AISI 4340 Steel (4350 is OK) – which is Exactly 1.55″ Wide, and 3/16″ Thick. This is As Close to CRES (Stainless Steel) as you should ever get. NOTE: 4140 Steel is OK, But the Extra Nickel Alloyed into the 4300 Series will make a Big Difference in Toughness.
> And Now you have an Alloy Steel that is :
Iron(Fe)-(95%), Carbon(C)-(0.38-0.43%), Silicon(Si)-(0.15-0.35%), Manganese(Mn)-(0.6-0.8%), Phosphorus(P)-(0.035%), Sulfur(S)-(0.04%), Chromium(Cr)-(0.7-0.9)%), Nickel(Ni)-(1.65-2.0%), Molybdenum(Mo)-(0.2-0.3%), Aluminium(aluminum)(Al)-(0%), Copper(Cu)-(0%), Niobium(Nb)-(0%), Titanium(Ti)-(0%), Vanadium(V)-(a Trace), and No Cerium(Ce), Nitrogen(N), Cobalt(Co), Lead(Pb), or Boron(B).
> 2. Heat Treating by Hand
Before I begin the “Zonal” Heat-Treating (specific areas) of the blade blank and Haft, I first cut out the Entire Profile from the rectangular strap – leaving 1/16″ Extra mat’l. on All Sides. Acquire a 16oz. Sheet Metal “Dolly” (hammer) polished glassy smooth on the face. Smooth your Heaviest (and largest) Anvil top face with 400 Grit Alum. Oxide sandpaper. Next, Get a Pure Charcoal Fire started with NO Flamable Liquids (“fire starters”) present. NEVER Use ANY GAS or
Liquid Fuel for Heating Steel. Clamp a large “Vice-Grips” on near the heel (back end), and heat the blade area evenly to “Bright Red” – BEFORE Each Step:
> A. Hold the blade area flat against the new smooth anvil surface. Lightly and rapidly tap, holding the “Dolly” flat, and moving quickly from hand-guard (haft) to the point. Start with the back (top) of the blade and work toward the cutting edge in four passes. Reheat and Repeat 3 more times.
> B. Turn the blade over, Reheat the blade for each pass, then, tapping quickly, and moving Exactly as above, for 4 times total.
> C. Reheat the blade area to “Bright Red” – quench the back of the blade (opposite the cutting edge) in a pure oil bath, (drained “crankcase” oil is fine) holding about 1/2″ to 3/4″ deep – Hold there until cool. ( D. Mix a strong Salt-water bath in a pan (5-6″ Deep), Reheat the blade area to “Bright Red” – for quenching, immerse the Whole Blade – cutting edge first – holding the blade area immersed until cool – 1-2 minutes.
> You now have the “Interstitial” Carbon granules properly oriented for Maximum Strength.
> 3. Using a 6″ (wheel size) electric bench grinder, with a new, fine, & soft grinding wheel – (like the ones used to sharpen cutting tools) – running at 3500 RPM – Slowly and Gently “Finish Profile” the tang and the grip side of the hand guard first, quenching in cool water frequently ( every 5-20 secs.). Refill Dunk Pan with cold water often. The Tang should taper from 3/4″ W. at the hand guard to 1/4″ W. at the “heel”. Next, C-A-R-E-F-U-L-L-Y finish profile the entire blade area and the front of the hand guard, using the Same frequent “Quench cooling”.
I always cut out a 7″ Bowie knife profile. At this time, You Are NOT Cutting the concave edge relief -or- the blade edge.
> 4. Now you know just how Jim Bowie made such superb knives – always sought after by the frontiersman. His alloy may not have had the metalurgist’s perfection, but Jim Knew Heat Treating.
I will supply the Details of the follow-on steps- If Anyone asks me . . .
> 5. The Concave Grind – to maximum of 3/4″ from Cutting Edge
> 6. Polishing and Finishing the Entire Profile
> 7. Cutting Leather and Rubber Rings (for the grip) using SHARP pipe dies
> 8. Cutting Hard Brass washers for Haft and Heel Ends.
> 9. Profiling and Sharpening Cutting edge
REMEMBER: You are NOT Making a Saw Blade; a Filet, Skinner, or Steak Knife; and use your “Straight Razor” for shaving.
Ol’ Bill in Idaho
Robrt grantz | February 24, 2016
|
to Bill in Idaho, dated 02/24/16.. knife maker for 55 years.
Please send me your emal address. I would like speak with you about making a knife for me. Your heat treating is right and I want a knife made with that specs.
I look forward to your reply.
Erik | July 10, 2016
|
Wondering if you could elaborate on the Concave Grind?
Pingback:What Makes A Good Survival Knife | TheSurvivalPlaceBlog | February 26, 2016
|
Joon Cobia | September 6, 2016
|
Long article, but very good. Many interesting guidelines for the selection and protection of the best kitchen knife.
Pingback:Best Bushcraft Tips To Learn And Share For Survival | Survivopedia | September 13, 2017
|